
In Arlington MA, a lot of homeowners hit the same wall. They want the kitchen to look cleaner and more current, but they don't want a small backsplash update to turn into a full remodel bill. Our team sees that every week across Arlington, Cambridge, Somerville, Belmont, Newton, Medford, and the rest of Greater Boston.
We approach these projects the way Massachusetts licensed general contractors should. We look at finish cost, moisture exposure, heat at the range, wall condition, and whether the scope triggers permits under the MA State Building Code, 780 CMR. A simple backsplash swap usually doesn't need a building permit by itself, but once you open walls, add outlets, move wiring, or change plumbing, permit and inspection requirements can come into play.
Find kitchen backsplash ideas cheap enough to fit a real household budget here. These are 8 low-cost backsplash materials we recommend, with honest trade-offs and code-smart guidance for Greater Boston homes.
Table of Contents
- 1. Peel-and-Stick Tile Backsplash
- 2. Painted Backsplash High-Gloss or Enamel
- 3. Beadboard or Shiplap Backsplash
- 4. Ceramic or Porcelain Tile Surplus or Discontinued Stock
- 5. Stainless Steel Backsplash Sheets
- 6. Glass Tile Backsplash Budget-Friendly Sizes
- 7. Vinyl or Wallpaper Backsplash
- 8. Natural Stone Veneer or Faux Stone Backsplash
- 8-Option Budget Kitchen Backsplash Comparison
- Ready to Transform Your Kitchen Backsplash?
- Frequently Asked Questions
1. Peel-and-Stick Tile Backsplash
Peel-and-stick is the fastest way to change the look of a kitchen without tearing into walls. In Cambridge condos and Somerville rentals, we see homeowners use subway-look vinyl and mosaic patterns to freshen up dated kitchens before they commit to a bigger renovation.
This option stays cheap because labor drops out of the equation. Peel-and-stick backsplash tiles can cost as little as about $1 per square foot, and that matters if you're trying to update a kitchen on a tight budget.
Best use in Cambridge and Somerville kitchens
Use peel-and-stick in low-splash areas, dry prep zones, and rentals where reversibility matters. We don't recommend it as the long-term answer behind every range or sink, especially in older Greater Boston homes where wall surfaces are uneven and humidity swings can be rough.
Practical rule: If the wall isn't clean, flat, and grease-free, peel-and-stick won't stay put for long.
A few installation habits make a big difference:
- Degrease first: Wash the wall with TSP or a strong degreaser so the adhesive bonds to the surface instead of kitchen residue.
- Lay out from center: Start at a focal line, usually under the hood or centered behind the range, then work outward so cuts land evenly.
- Press hard: Use a roller or squeegee to push out bubbles and seat edges tight.
- Seal weak points: A small bead of caulk at the counter line helps in splash-prone areas.
If you want more DIY-friendly layouts and finishing ideas, our guide to kitchen backsplash ideas DIY is a good next step.
For anyone comparing kitchen remodeling Arlington, kitchen remodeling Belmont, or kitchen remodeling Somerville options, this is often the temporary fix before a full tile installation.
2. Painted Backsplash High-Gloss or Enamel
You move into a Boston-area kitchen with decent cabinets, tired walls, and no budget for tile. Paint is the fastest fix if the drywall is sound and the splash zone is modest.
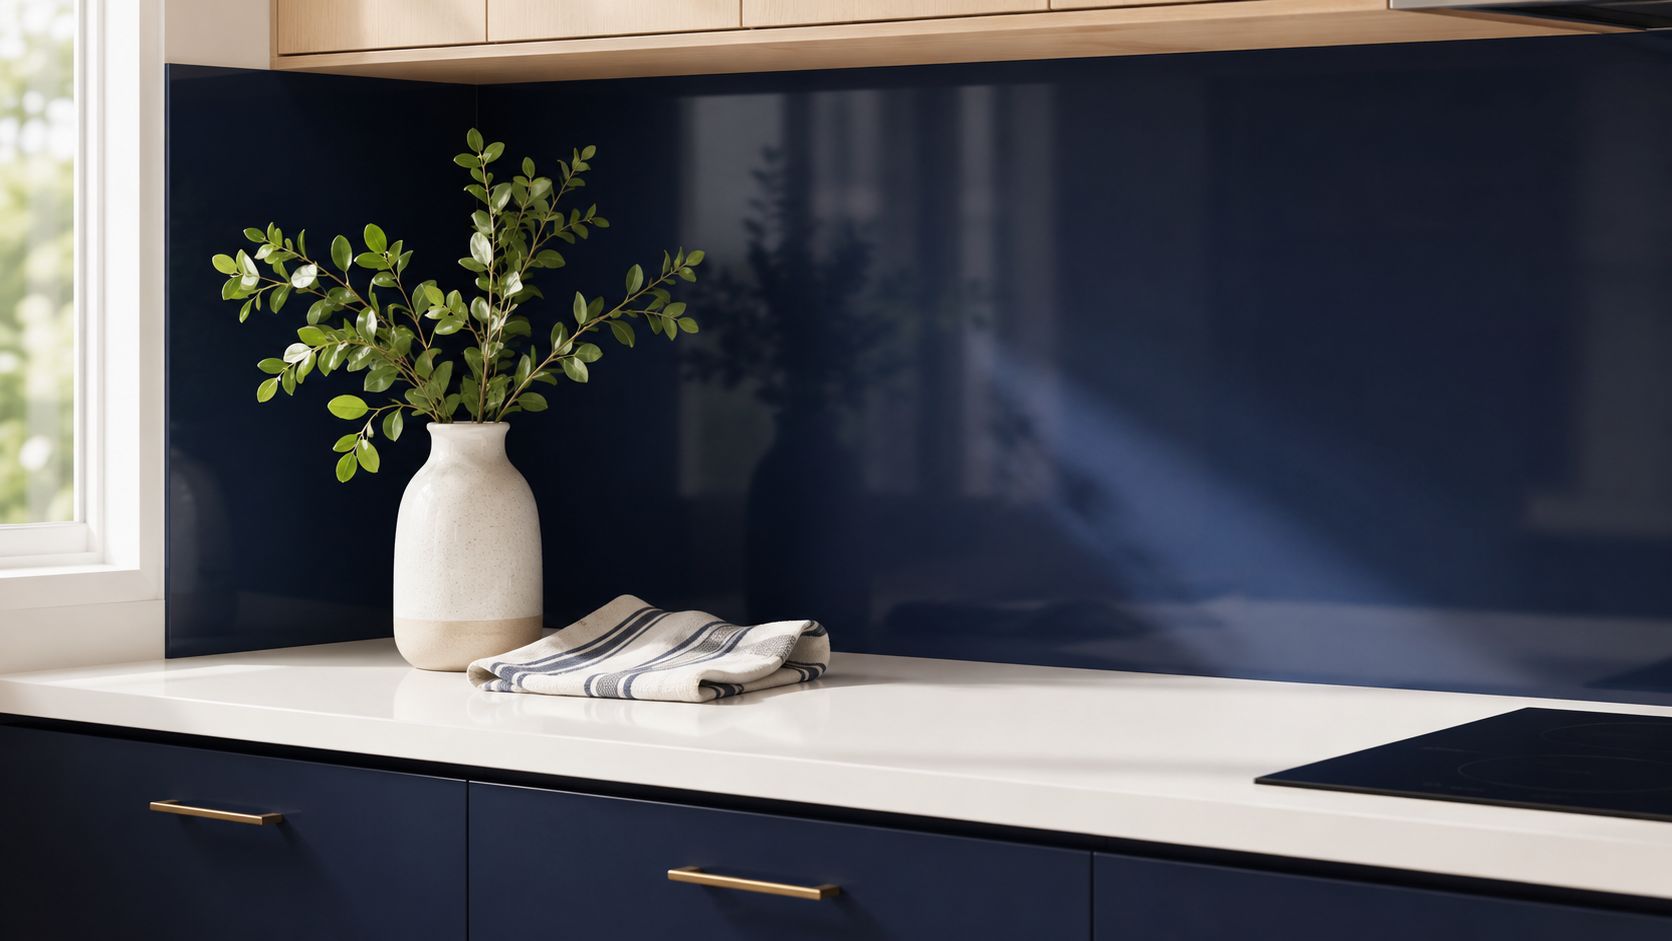
We recommend this option for condos and smaller kitchens in Stoneham, Melrose, and Wakefield where you want a clean reset without opening walls or chasing special-order material. Use a scrubbable enamel or cabinet-grade paint. Benjamin Moore Advance, Sherwin-Williams ProClassic, and Behr Premium Plus Ultra are the usual picks because they level better and clean up easier than standard wall paint.
Where paint earns its keep
Paint makes sense behind side counters, beverage stations, and lighter prep runs. It also works well in older Greater Boston homes where the wall is already patched and flat enough to finish cleanly. Deep navy, muted sage, and warm white usually hold up better visually than trendy colors that date fast.
Labor and material costs stay low compared with tile. For a standard backsplash area, you can usually keep the project modest if the wall needs minimal repair, and HomeAdvisor's backsplash cost guide gives a reasonable benchmark for comparing paint against tile installs.
Skip paint alone behind a high-output gas range. In Massachusetts kitchens, we treat that area more carefully because grease, heat, and cleaning wear it out fast. If the manufacturer calls for specific clearances or wall protection, follow that first. Cosmetic shortcuts lose money when they fail in a year.
Good prep decides whether painted backsplash looks intentional or landlord-grade.
Our install sequence is simple:
- Repair the wall first: Fill dents, sand ridges, and remove loose caulk. Paint highlights bad drywall work.
- Use bonding primer: This matters over patches, old semi-gloss, or surfaces with cooking residue.
- Pick the right sheen: Semi-gloss or high-gloss wipes down better than eggshell.
- Seal countertop joints: A tight bead of paintable caulk at the counter line keeps splash water out.
- Cut sharp lines: Sloppy edges ruin the whole job, especially in small kitchens with under-cabinet lighting.
One local caution. In older Boston and Cambridge homes, we often find layers of old paint, uneven plaster, or patched masonry around former chimney walls. That can turn a cheap paint job into a surface-prep job fast. If your wall has staining, crumbling plaster, or active moisture, fix that before you open a can.
If you're pricing the backsplash along with cabinet repainting or wall work, this guide to North Shore interior painting costs gives a useful comparison framework for finish planning.
3. Beadboard or Shiplap Backsplash
Your kitchen needs more than a cheap surface. In a lot of Greater Boston homes, it also needs to look like it belongs there. Beadboard does that well in Belmont colonials, Newton capes, and Newburyport cottages, especially when the room already has painted trim, inset-style cabinets, or older millwork details.
It is one of the lower-cost ways to add texture and character without paying tile labor rates. Material pricing stays approachable, especially if you use primed MDF beadboard panels in a dry area or upgrade to PVC or better-grade wood near sinks and heavy splash zones.
Best fit for older Greater Boston homes
We recommend beadboard or shiplap for homeowners who want a finished, built-in look instead of a flat wall. White remains the best choice. It hides style swings, works with most cabinet colors, and matches the older-house architecture common across Boston-area neighborhoods. Soft greige can work too, but only if the rest of the kitchen already leans warm and traditional.
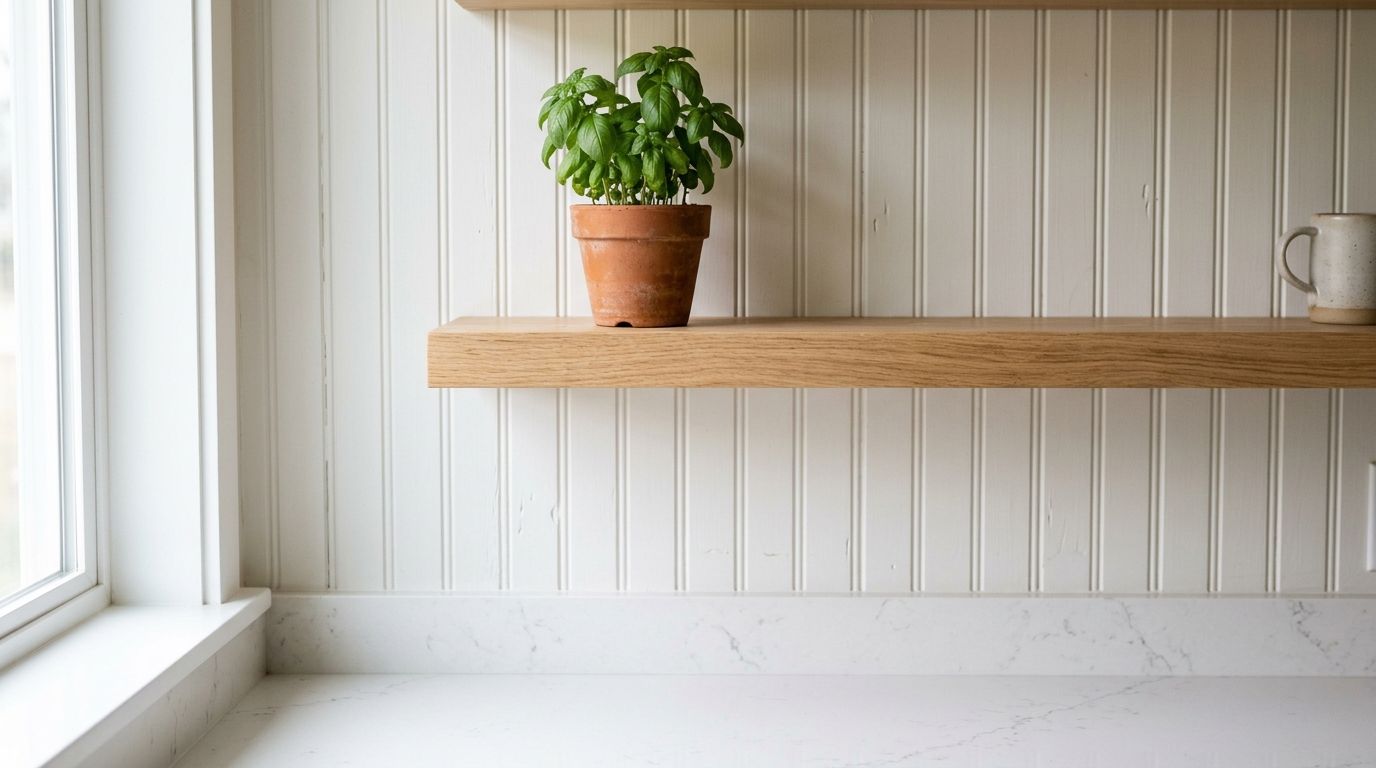
The weak point is maintenance. Grooves collect grease. Seams fail if the material is not sealed well. Around a sink, cheap panels can swell fast if water gets behind them. That is why we prime cut edges, caulk the bottom joint at the counter, and use a washable topcoat instead of treating this like basic wall trim.
Behind a stove, use more caution. We do not recommend standard beadboard directly behind a high-output gas range unless the appliance specs allow it and the wall assembly is protected correctly. In Massachusetts, 780 CMR and the manufacturer instructions drive that decision. If the range calls for clearances or a noncombustible surface, follow that. A small tile or metal insert behind the cooktop is usually the smarter move.
Our install rules are simple:
- Choose the right panel: PVC or moisture-resistant stock holds up better than bargain paneling in splash zones.
- Seal every exposed edge: Cut ends and bottom edges are where failure starts.
- Keep grooves shallow and paint-grade: Deep texture looks good for a month and cleans badly for years.
- Use kitchen-rated coatings: Satin or semi-gloss paint wipes down better than flat finishes.
- Treat the range wall separately: Use tile, metal, or another more heat-tolerant surface where grease and flame exposure are highest.
This option earns its keep when you want charm on a strict budget. It just needs disciplined prep and smart placement. Use it on the sink run, coffee station, or perimeter walls. Skip it in the hottest part of the kitchen unless the specs clearly support it.
4. Ceramic or Porcelain Tile Surplus or Discontinued Stock
You want real tile, you want it cheap, and you do not want the kitchen to look cheap. Surplus and discontinued ceramic or porcelain tile is usually the best answer.
In Greater Boston, this option rewards homeowners who can make decisions fast. Local tile shops, flooring warehouses, and reuse centers get odd lots, canceled orders, and end-of-line inventory all the time. The good deals go first. If you find a color and size that works, buy it the same week and buy extra from the same lot.
Ceramic subway tile is still the budget workhorse, and porcelain is the better pick if you want a harder surface with lower water absorption. For basic cost ranges on ceramic and porcelain tile, the Home Depot tile buying guide gives a more reliable pricing baseline than clearance-blog roundups: ceramic and porcelain tile buying guide.
The catch is selection. You are buying what exists, not what a designer can reorder six months from now. That means simple field tile wins. White, off-white, soft gray, and warm greige are easier to match with trim, counters, and future repairs. Loud patterns are harder to expand and harder to fix.
A lot of older Boston-area kitchens also have walls that are less flat than homeowners expect. Tile does not hide that. If you are pairing a surplus backsplash with stronger contrast elsewhere, look at these backsplash ideas for dark cabinets so the whole kitchen feels intentional instead of pieced together from leftovers.
Here is how we keep these installs from going sideways:
- Buy overage on day one: Discontinued stock disappears fast. Save extra tile for outlet cuts, breakage, and future repairs.
- Check every box before install: Confirm dye lot, caliber, and finish consistency. Slight size variation can wreck grout lines.
- Stick with simple layouts: Straight set, stacked, or running bond gives you cleaner cuts and less waste.
- Use trim on purpose: Bullnose, Schluter profiles, or a clean end at a cabinet matters more when the tile itself was a bargain.
- Choose grout for maintenance, not showroom looks: A mid-tone grout usually wears better in a working kitchen than bright white.
- Verify the wall is tile-ready: In older plaster kitchens, loose spots and waves need repair before thinset goes on.
Massachusetts code usually does not make a standard backsplash permit-driven by itself, but the job can cross that line fast if you open walls, move receptacles, or change wiring. That is common in Arlington, Medford, and Dorchester kitchens where the backsplash upgrade turns into an electrical cleanup. Once outlets move or box extensions are needed, call a licensed electrician and keep the work clean for inspection.
Professional install starts to make sense here. Cheap tile still looks expensive when the cuts are clean, the outlet spacing is tight, and the finish line under the cabinets is straight. Cheap tile looks cheap when those details are sloppy.
5. Stainless Steel Backsplash Sheets
Stainless steel doesn't fit every house, but where it fits, it works hard. In Lexington, Brighton, and more modern Somerville kitchens, stainless sheets give you a clean, wipeable surface that handles moisture and cooking mess well.
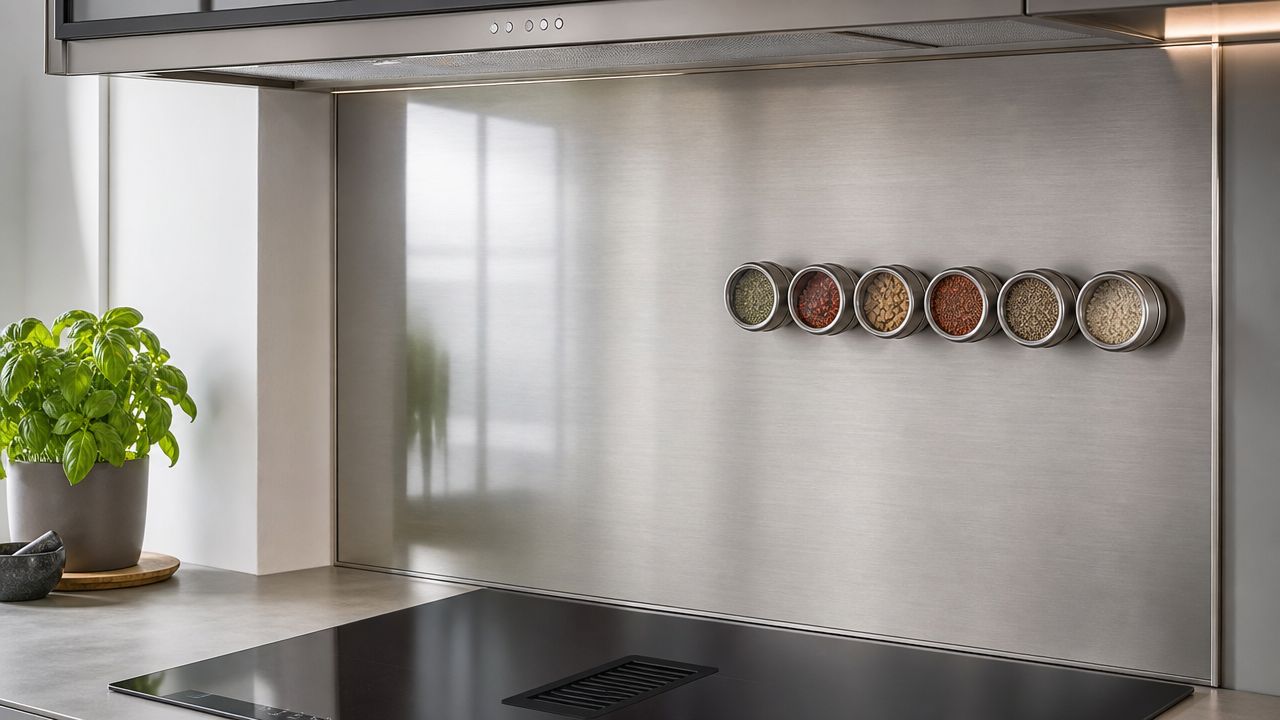
We usually steer homeowners toward brushed finishes over polished ones. Brushed steel hides fingerprints better, looks less commercial, and is easier to live with in a busy family kitchen.
Where stainless makes sense
This is a strong choice behind a range, especially when you want a simple panel instead of dozens of grout lines. The wall needs to be flat, the cuts around outlets need to be clean, and edge trim matters. Without those details, stainless can look unfinished fast.
A lot of homeowners pairing darker counters with brighter backsplash materials also consider this option. If you're looking at contrast-driven layouts, our roundup of kitchen backsplash ideas with dark cabinets shows where metal surfaces can work well.
A few shop-floor rules apply here:
- Start with a flat substrate: Stainless telegraphs wall defects.
- Use trim pieces: Exposed cut edges look rough and can feel sharp.
- Clean gently: Non-abrasive stainless cleaners beat aggressive scrub pads.
- Fasten correctly: Adhesive alone isn't always enough, depending on panel type and wall condition.
For kitchen remodeling Lexington or kitchen remodeling Brighton style projects, stainless is often the practical choice, not just the design choice.
6. Glass Tile Backsplash Budget-Friendly Sizes
A lot of older Boston-area kitchens need more light, not more stuff. Glass tile helps small cooking spaces feel cleaner and brighter, especially in triple-deckers and tighter Newton or Cambridge layouts where the footprint is staying put.
Keep the spec simple. Standard glass subway tile in white, light gray, or a muted blue gives you the best value. Skip mixed mosaics, heavy iridescence, and specialty edge pieces if you're trying to control cost.
When to use glass in Newton and Cambridge kitchens
Glass sits above peel-and-stick and paint on price, but it still works on a realistic mid-range backsplash budget if you buy common sizes and keep the pattern straightforward. The National Kitchen and Bath Association notes that material choice and installation complexity drive backsplash cost, and glass goes up fast once you add intricate cuts, borders, and premium trims.
For many homeowners, glass makes sense when the goal is a permanent finish that brightens the room and cleans easily. It is less forgiving to install than ceramic. Every low spot in the wall, crooked outlet cut, and sloppy thinset line tends to show.
Our field rules are simple:
- Start with a flat wall: Glass highlights humps and dips faster than most tile.
- Use white mortar approved for glass: Dark or mismatched setting material can telegraph through translucent tile.
- Plan outlet cuts carefully: One bad cut can ruin the whole run.
- Choose grout for kitchen cleanup: Epoxy or urethane grout holds up well against splatter and routine wiping.
- Call a pro for range-wall layouts: In Massachusetts homes with older plaster or uneven substrates, such conditions typically lead to DIY installs going sideways.
If you want style direction before buying material, our roundup of glass kitchen backsplash ideas shows which looks suit New England kitchens.
This installation video gives a good visual sense of layout and handling before you decide:
7. Vinyl or Wallpaper Backsplash
Vinyl and wallpaper are the bottom-budget answer when you need a visual change more than a permanent finish. In Arlington apartments, Somerville rentals, and temporary Medford kitchen refreshes, this can absolutely make sense.
Inexpensive vinyl peel-and-stick wallpaper backsplashes can cost as little as $1 per square foot. That's why they're everywhere in online before-and-after photos.
A short-term fix for rentals and light-use kitchens
We treat vinyl backsplash products as cosmetic, not structural. They work best away from direct steam, standing water, and heavy grease. If you're trying to cover the entire wall behind a busy sink and range, this isn't the material we'd choose for a homeowner who wants it to stay put and look good for years.
The practical install method is straightforward:
- Clean aggressively: Grease ruins adhesion faster than anything else.
- Use a smoothing tool: Work out bubbles as you go, not after.
- Trim carefully: Clean cuts at cabinets and outlets make cheap materials look better.
- Keep heat in mind: Reinforce vulnerable spots near the range with proper edging or a different material.
For homeowners searching kitchen remodeling near me in Arlington, kitchen remodeling near me in Somerville, or kitchen makeover services Medford, this option is often the bridge between move-in and a future renovation.
One caution matters here. A 2025 NARI study cited by Tasting Table reported that 38% of DIY peel-and-stick backsplashes in kitchens required full replacement within two years due to warping or adhesive degradation. In Greater Boston kitchens with winter dryness and summer humidity, that's a real trade-off.
8. Natural Stone Veneer or Faux Stone Backsplash
A lot of Greater Boston homeowners see stone in a showroom and assume it will add instant character. In a real kitchen, stone only earns its keep when the house style supports it and the cleanup burden makes sense.
This option is best for accent areas. Use it on a short backsplash run, a coffee station wall, or a feature section that does not take daily grease and sauce splatter. Covering the entire wall behind a hard-working range with rough stone usually turns into a maintenance problem.
Natural stone costs more than the other budget backsplash ideas on this list, and labor rises fast if the wall is uneven or the pieces need a lot of trimming. Faux stone panels or thin veneer are the budget move if you want the look without paying premium tile and masonry rates. The National Kitchen and Bath Association notes that natural stone remains a higher-cost finish category than many common backsplash materials, especially once fabrication and installation are included: NKBA kitchen backsplash material guidance.
Stone looks expensive because it is. It also asks more from the installer and the homeowner.
In older Cambridge, Somerville, and Arlington kitchens, wall prep matters more than homeowners expect. Plaster, patched drywall, and out-of-flat surfaces can make panel systems telegraph every defect. If the substrate is weak, fix that first.
Here is the right way to approach it:
- Keep texture under control: Choose flatter profiles near cooking zones so grease does not collect in deep joints.
- Use the right base: Heavier veneer needs a sound, approved substrate. Loose drywall and failing plaster are bad candidates.
- Seal natural stone properly: Stone around sinks and prep areas stains fast if you skip sealing.
- Plan edge details early: Outside corners, cabinet terminations, and outlet cuts separate a sharp install from a cheap-looking one.
- Call a pro when weight or cutting gets serious: Some veneer products are simple. Others need better fastening, wet saw work, and cleaner finish carpentry than a weekend DIY job can deliver.
Massachusetts code is not the main obstacle here. Good judgment is. Around receptacles, keep box extensions and cover plates flush to the finished surface, and do not bury electrical problems behind a decorative wall treatment. If the backsplash area is part of a larger kitchen renovation in Boston or Brookline, permit scope can expand quickly once electrical or wall repairs are involved.
We recommend stone only when it fits the architecture, the homeowner wants texture more than easy cleanup, and the budget leaves room for proper prep. In most budget remodels, faux stone works better than real stone.
8-Option Budget Kitchen Backsplash Comparison
| Option | 🔄 Implementation Complexity | ⚡ Resources & Cost | ⭐ Expected Outcomes (Quality & Durability) | 📊 Ideal Use Cases | 💡 Key Advantages / Tips |
|---|---|---|---|---|---|
| Peel-and-Stick Tile Backsplash | Low, simple peel-and-stick DIY; minimal tools; avoid direct heat zones. | Very low, $75–$300 (40–80 sq ft) materials; no labor if DIY. | ⭐⭐, Water-resistant, not fully waterproof; 3–5 years in high-splash areas. | Renters, quick weekend updates, accent walls, low-moisture kitchens. | Fast, removable, affordable; clean surface, use squeegee, consider heat tape and caulk seams. |
| Painted Backsplash (High-Gloss/Enamel) | Very low, standard painting skills; 1–2 days including drying; needs primer. | Extremely low, $50–$200 materials; DIY-friendly. | ⭐, Lowest durability; prone to chips/peeling and moisture damage; frequent touch-ups. | Budget makeovers, renters wanting color change, temporary or seasonal looks. | Cheapest and fully customizable; use kitchen-grade enamel and bonding primer; seal edges with caulk. |
| Beadboard / Shiplap Backsplash | Low–Medium, measure, cut, nail or interlock; requires painting/sealing and seam work. | Low, $200–$600 materials; $300–$800 labor if hired. | ⭐⭐⭐, Moderate durability; grooves trap grease; needs resealing every few years. | Farmhouse/coastal/cottage kitchens; hiding imperfect walls; cozy aesthetics. | Adds texture and charm; prime/paint with kitchen-grade finish, seal grooves, install backer behind stove. |
| Ceramic/Porcelain Tile (Surplus/Discontinued) | Medium, traditional mortar/grout installation; pro recommended for best finish. | Low–Mid materials $2–$5/ft; labor $8–$15/ft (total ~$10–$20/ft installed). | ⭐⭐⭐⭐, Authentic, fully waterproof, long-lasting (30+ years) when properly installed. | Homeowners seeking real tile at discount, resale-focused projects, code-compliant kitchens. | High durability and resale value; buy 10–15% extra tile, use epoxy grout and pro installer. |
| Stainless Steel Backsplash Sheets | Medium, panel fitting/fastening or adhesive; requires flat substrate and trim finishing. | Mid-range, material $3–$8/ft; installed $8–$12/ft; ~$300–$1,400 typical (40–80 sq ft). | ⭐⭐⭐⭐, Extremely durable, waterproof, heat-resistant; shows fingerprints and can dent. | Modern/industrial kitchens, heavy-cooking areas, commercial-style designs. | Seamless, easy to clean, magnetic storage; choose brushed finish, use non-abrasive cleaners and edge trim. |
| Glass Tile Backsplash (Budget Sizes) | Medium–High, thin-set and grout installation; careful placement to avoid visible adhesive. | Mid, tiles $2–$5/ft; labor $8–$15/ft; ~$700–$1,800 total (40–80 sq ft). | ⭐⭐⭐⭐, Waterproof, stain-resistant, very durable and light-reflective for 30+ years. | Small or dark kitchens needing brightness; contemporary and modern designs. | Reflective, long-lasting finish; use epoxy grout, neutral glass colors, and an experienced installer. |
| Vinyl or Wallpaper Backsplash | Very low, peel-and-stick or paste application; quick 2–3 hour install for small areas. | Very low, $20–$200 (peel-and-stick) or $50–$150 (wallpaper) for typical area. | ⭐⭐, Shorter lifespan (2–3 years); not fully waterproof; adhesive may fail near heat/humidity. | Renters, temporary updates, seasonal or budget refreshes, low-splash zones. | Wide design options and removable; prep surface well, use smoothing tool, plan for periodic replacement. |
| Natural Stone Veneer / Faux Stone Backsplash | High, thin-set installation, sealing, possible wall reinforcement; pro recommended. | Mid–High, materials $4–$10+/ft; installed total ~$800–$2,400 (40–80 sq ft). | ⭐⭐⭐⭐, High-end look, durable 20–30+ years (natural needs regular sealing). | Upscale renovations, statement feature walls in premium homes. | Adds perceived value and texture; hire experienced installer, apply waterproofing/backer board and seal natural stone regularly. |
Ready to Transform Your Kitchen Backsplash?
If you're trying to keep costs down, the smartest move is matching the material to the way your kitchen is used. Peel-and-stick, vinyl, and paint are fine when you need a quick cosmetic improvement. Real tile, stainless, and properly detailed panel systems make more sense when the wall sees daily cooking, steam, and cleanup.
Budget matters, but so does lifespan. The national average cost for a 30-square-foot kitchen backsplash installation is about $1,000, while DIY projects with inexpensive materials can start around $120. We don't use national pricing to estimate Greater Boston jobs, but that comparison makes the core point clear. Material choice and labor scope are what move the number.
In our local market, labor and finish expectations are usually higher. If you're in Cambridge, Belmont, Lexington, Somerville, Newton, Medford, Wellesley, or Arlington, and you want a backsplash that lasts, we recommend looking beyond sticker price alone. A cheap product that fails in a wet or hot kitchen zone isn't really the cheaper option.
This is also where permit awareness matters. A backsplash-only finish job often stays simple. But if the project grows into new lighting, relocated outlets, circuit work, plumbing changes, venting changes, wall repair, or structural kitchen work, 780 CMR, local building departments, and trade permits all come into play. Rough inspections and final inspections can follow depending on the scope. Our team handles that coordination across Greater Boston, and that keeps the job moving without surprises.
Homeowners often find us while comparing kitchen remodeling Medford, kitchen remodeling Somerville, kitchen remodeling Lexington, or kitchen remodeling Arlington contractors. If that's where you are, keep the decision simple. Use temporary materials for temporary goals. Use permanent materials where heat, water, and daily wear demand it. And if the walls are uneven, the outlet layout is awkward, or the finish needs to tie into a broader remodel, bring in a pro before you waste time and material.
Frequently Asked Questions
Do I need a permit to replace a kitchen backsplash in Massachusetts?
Usually, a simple finish replacement doesn't require a building permit by itself. If you open walls, move electrical, add outlets, relocate plumbing, or change ventilation, permit requirements can apply under 780 CMR and local town procedures. We handle that coordination with the building department when the scope expands.
What's the cheapest backsplash option that still looks good?
Paint, vinyl, and peel-and-stick are usually the lowest-cost paths. If you want the best balance of low cost and long-term durability, surplus ceramic subway tile is often the better value.
Can we stay in the house while this work is happening?
Yes, in most backsplash-only jobs you can. There may be short periods where the kitchen is partially blocked, especially during surface prep, cutting, grouting, or caulking, but it usually isn't a full displacement situation.
When should I hire a contractor instead of doing it myself?
Hire a contractor when the wall is uneven, the backsplash runs behind a range, tile cuts are complex, outlets need adjustment, or the project is part of a larger kitchen remodel Greater Boston scope. The finish will last longer, and you avoid code and waterproofing mistakes.
How do you handle change orders on kitchen projects?
We price the agreed scope first, then document changes clearly if hidden wall issues, added electrical work, or material upgrades come up. That way you know what changed, why it changed, and what it costs before the extra work moves ahead.
Ready to get started? Contact Aureli Construction for a free estimate. We're a Massachusetts licensed general contractor serving Arlington, Belmont, Brighton, Brookline, Burlington, Cambridge, Lexington, Medford, Melrose, Newburyport, Newton, Reading, Somerville, Stoneham, Wakefield, and Wellesley with practical, code-smart kitchen remodeling guidance.