
In Cambridge and Somerville, a lot of remodel conversations start the same way. Homeowners point at the future vanity, the new shower, the kitchen island, and the tile sample board. Then we open the wall or trace the existing stack in the basement, and the true conversation starts.
That's where plumbing vent sizes stop being abstract code language and become a make-or-break part of the job. If you're adding a bathroom in a triple-decker, finishing a basement in Medford, or redesigning a kitchen in Newton with an island sink, the venting plan affects layout, cost, inspection, and whether the plumbing will work properly after the walls are closed.
In Massachusetts, this matters even more because plumbing work is tied to permits, inspections, and code compliance under 248 CMR, with the broader building process governed through 780 CMR and your local building department. Homeowners usually notice vent problems only after the fact. Slow drains, gurgling fixtures, trap siphonage, and sewer odor are the clues. By then, fixing it is harder and more expensive.
Table of Contents
- The Hidden World of Plumbing Vents in Your Somerville Home
- Why Proper Vent Sizing Is Non-Negotiable in Massachusetts
- The Core Principles of Sizing Plumbing Vents
- Vent Sizing Examples for Your Boston Home Remodel
- Advanced Venting Scenarios for Kitchen and Bath Remodels
- How We Manage Plumbing Permits and Inspections in Massachusetts
- Common Plumbing Venting Mistakes We Are Called to Fix
- Frequently Asked Questions About Plumbing Venting
- Does adding or correcting vents increase bathroom remodel cost?
- What are the signs of a venting problem?
- Does every fixture need its own separate vent?
- Will a bathroom or kitchen venting change require a permit in Massachusetts?
- Can you hide venting problems during a remodel and deal with them later?
The Hidden World of Plumbing Vents in Your Somerville Home
A Somerville homeowner planning a second bathroom usually expects decisions about fixtures and finishes. They don't expect the old cast iron stack, the framing path, and the roof penetration to decide half the plumbing layout. But that's how these projects go.
A vent isn't just a pipe that sticks through the roof. It's the air side of the drain-waste-vent system. When water moves through the drains, the vent system lets the piping breathe so fixture traps keep their water seal and drains move without pulling air through the wrong place.
If a sink gurgles when the toilet flushes, or a tub drains sluggishly for no obvious reason, that often points back to venting. In older Greater Boston houses, especially triple-deckers and chopped-up remodels, we see layers of old work where someone tied in a new fixture but never gave enough attention to the vent path.
Why older homes confuse people
Part of the confusion comes from older practice. A Fine Homebuilding review of vent sizing notes that earlier codes required vent pipes to be the same size as the building drain, which is why 3-inch vent pipes stayed common for years. Under more modern IRC guidance, a 3-inch drain only needs a vent at least 1 1/2 inches in diameter.
That history matters in houses around Cambridge, Newton, and Somerville because homeowners often assume bigger automatically means correct. It doesn't. The right answer today is usually a code-based answer, not a habit-based one.
Old venting systems can look oversized in one area and still be wrong where the new work ties in.
What this means during a remodel
When we look at a bathroom addition, kitchen rework, basement bath, or ADU layout, we're not just asking where the sink or toilet goes. We're asking:
- Where the drain ties in
- How the vent rises and reconnects
- Whether the run is too long for the planned pipe size
- Whether the layout can be wet vented legally
- How the inspector in that town is likely to review the rough
That's the hidden part homeowners don't see on day one, but it's often what determines whether the remodel goes smoothly.
Why Proper Vent Sizing Is Non-Negotiable in Massachusetts
Improper vent sizing isn't a cosmetic issue. It's a function issue and a health issue.
Every plumbing fixture depends on a trap seal. That water sitting in the trap is what blocks sewer gas from entering the house. If the drainage system can't pull in enough air because the vent is undersized, badly routed, or missing where it should be, wastewater moving down the line can siphon that trap.
Once that water seal is compromised, you can get odor, unstable drainage, and plumbing that behaves differently depending on what fixture is in use. Homeowners usually describe it as “the sink sounds weird” or “the toilet bowl water changes when the shower runs.” That's the field version of a venting problem.
Why Massachusetts inspectors pay attention
In Massachusetts, plumbing work is reviewed under 248 CMR, and any remodel involving new or relocated fixtures also moves through the permit and inspection process with your local department. In Arlington, Brookline, Cambridge, Newton, and similar towns, the rough inspection is where bad vent planning gets exposed.
Inspectors don't care that the vanity is expensive or the tile lead time was long. If the venting is undersized, flat, misrouted, or not supported by the layout, the job doesn't pass. Then walls stay open, schedules slip, and the correction costs more because other trades are waiting.
What works and what does not
What works is a layout that's designed around the plumbing from the start. That means fixture placement, joist direction, stack location, and vent routing all get coordinated before rough-in.
What doesn't work is treating venting like an afterthought.
Practical rule: If the fixture layout only works on paper because “the plumber will figure it out later,” the layout usually needs to change.
This comes up constantly in bathroom renovation Arlington MA planning and in larger kitchen and bath updates across Greater Boston. Homeowners comparing contractors often focus on visible finishes, but the team that understands venting, permit sequencing, and rough inspection details is the one protecting the project.
A well-designed vent system does two things at once. It keeps the house safe, and it keeps the plumbing boring. That's the goal. No smells, no noise, no mystery drain issues, no failed inspections.
The Core Principles of Sizing Plumbing Vents
In Massachusetts, vent sizing starts with one question: what is this vent protecting? Under 248 CMR, the answer is tied to the drain served, the fixture load on that part of the system, and the full path the vent has to travel before it can do its job. That is why vent sizing on a remodel is rarely a “pick one size and run it everywhere” decision.
The code is written that way for a reason. A vent has to keep the trap seal from being pulled apart when water moves through the drain. If the vent is too small for the drain it serves, too long for its diameter, or asked to support more fixture load than the layout allows, the system may still drain, but it will not drain correctly or without noise for long.
Drain size sets the baseline
The first checkpoint is the size of the drain being vented. In plain terms, the vent cannot be arbitrarily smaller than the piping it is protecting. Massachusetts plumbers also have to respect the minimum vent sizes and the way 248 CMR handles fixture drains, trap arms, and branch connections.
That matters in real remodel work. A homeowner in Cambridge may ask whether a new shower, lav, and toilet can all “just tie into the existing vent in the wall.” Sometimes yes. Sometimes that existing vent is undersized once you account for the actual drain sizes and the way the bathroom group is being reworked. The right answer comes from the system layout, not from what fit the old bathroom fifty years ago.
If you are sorting out fixture drains at the same time, the drain side and vent side have to be coordinated. A good example is choosing the right shower drain pipe size for a bathroom remodel, because the venting strategy only works if the drain sizing and trap-arm layout work with it.
Developed length changes what works on paper
Developed length is the actual travel path of the vent pipe, measured along the route it takes, not the straight-line distance on the plan. In older Greater Boston houses, that difference is often the whole job.
A Newton kitchen remodel may look simple until the island sink vent has to work around a beam, cross framing, and rise through a crowded wall bay before connecting back into the vent system. A bathroom added in a Cambridge triple-decker often has the same problem. The vent route gets longer and more complicated than the sketch suggested.
Longer vent runs can force a larger vent size. They also affect whether a proposed layout is worth saving at all. I run into this during consults all the time. The homeowner wants to keep the fixture exactly where the designer drew it, but once the developed length and framing conditions are clear, moving the fixture a foot or two can be the cleaner and cheaper code-compliant fix.
The International Residential Code vent provisions are a useful public reference for the general rule that vent sizing is tied to drain size and vent run conditions, even though Massachusetts work must be checked against 248 CMR and local inspector expectations.
DFUs matter once vents are shared
Drainage fixture units, or DFUs, are how the code measures probable load on a drainage and venting system. One lavatory is a light load. A full bathroom group is different. A branch carrying multiple fixtures is different again.
Homeowners often get tripped up during remodel planning. They look at one sink or one toilet and assume the vent can be sized fixture by fixture. On a real job, we often size around the combined load on a branch, a wet vented bathroom group, or a stack section that is serving more than one fixture. The code uses DFUs because the vent has to protect the system under use, not just one fixture in isolation.
Massachusetts planning rules that affect vent size
For remodel planning, these are the principles that usually drive the decision:
- The drain size being served sets the starting point.
- The vent's developed length can require a larger pipe.
- Shared venting and wet venting depend on the total fixture load, not just one fixture.
- Existing piping in an older house may not be reusable if the new layout changes the load or routing.
- Local inspection matters. Cambridge, Newton, Somerville, and nearby towns may all enforce the same state code, but inspectors will expect a layout that clearly works in the field.
Quick reference for homeowners
| Fixture Type | What actually drives vent sizing |
|---|---|
| Lavatory sink | Fixture drain size, trap-arm layout, and whether it is part of a shared bathroom vent |
| Toilet | Water closet drain size, branch arrangement, and whether the bathroom group is wet vented |
| Shower | Trap and drain size, trap-arm distance, and how it ties into the bathroom vent system |
| Bathtub | Drain size, trap-arm routing, and whether the tub shares venting with other fixtures |
| Bathroom group on a shared vent | Combined DFU load, branch sizing, and the venting method permitted by code |
The practical takeaway is simple. Vent sizing is about protecting trap seals and keeping the drainage system stable under real use. In a Massachusetts remodel, especially in older housing stock, the “why” behind the code matters as much as the table lookup. That is what keeps a new bathroom or kitchen working after the walls are closed.
Vent Sizing Examples for Your Boston Home Remodel
A few real-world examples make this easier to visualize.
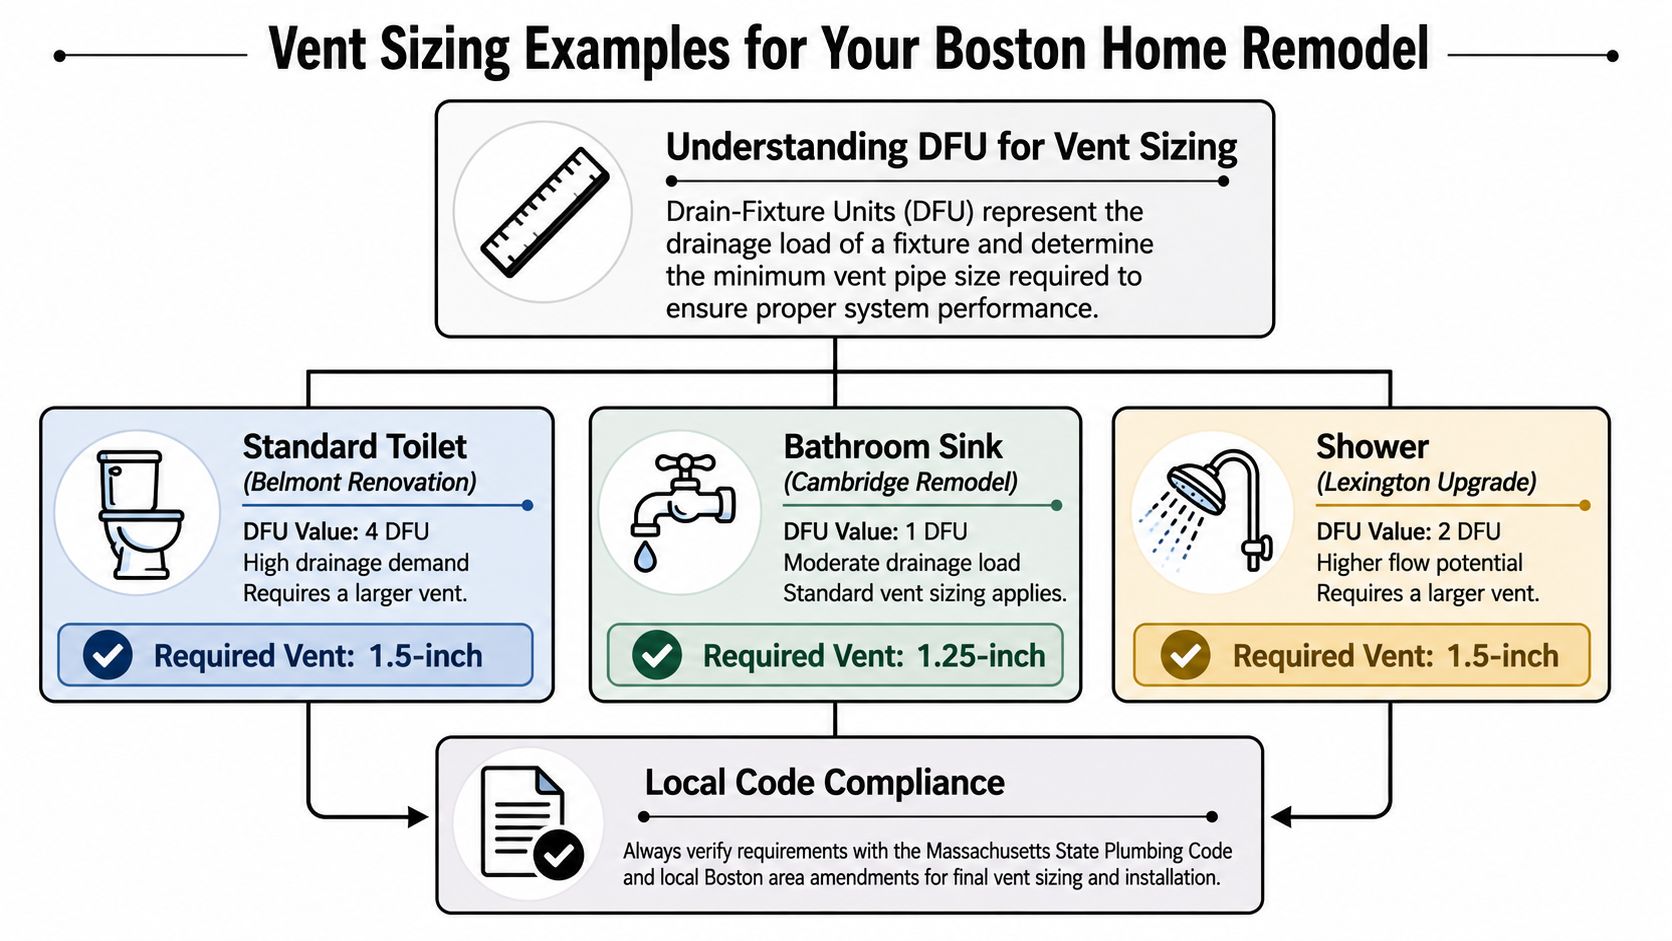
A toilet line in a Belmont bathroom renovation
A toilet usually sits on a 3-inch drain in residential work. Under the modern half-diameter rule noted in the earlier code reference, that drain typically calls for a vent of at least 1 1/2 inches. In practice, layout conditions, shared venting strategy, and the full branch design may justify a larger vent, but 1 1/2 inches is the key benchmark tied to the drain size.
That's a common detail in bathroom remodeling contractor Medford and bathroom renovation Newton discussions too. Homeowners hear “toilet” and assume they need a huge vent. Usually, they need the correct vent, not the biggest one.
A lav sink in a Cambridge bath remodel
A lavatory sink often surprises people because the vent can be smaller than they expect. Modern code guidance sets the absolute minimum vent size at 1 1/4 inches, assuming the rest of the layout works and the drain served supports that size under code logic.
In the field, we still look hard at accessibility, trap-arm path, wall depth, and whether the sink is part of a grouped bathroom venting arrangement. The smallest allowed pipe isn't automatically the best choice for every remodel.
For homeowners also sorting out shower rough-in details, this companion guide on what size drain pipe for a shower is worth reviewing because drain sizing and vent sizing always affect each other.
A quick visual helps when you're comparing fixture types:
A grouped basement layout in Cambridge MA
A basement finishing project in Cambridge MA often includes a half bath, utility sink, or small wet bar. Homeowners frequently make an error concerning these additions. They think each fixture can be judged in isolation. It can't.
When fixtures share a branch or use a code-approved venting method together, the branch vent has to reflect the total fixture load and the layout geometry. In older basements, the challenge is usually routing. The existing stack may be in the wrong place, headroom may be limited, and the easiest pipe path may not be the legal one.
- What works: Keeping fixtures clustered, keeping vent paths direct, and designing the layout around the existing stack when possible.
- What causes trouble: Spreading fixtures too far apart, forcing long horizontal vent runs, and assuming any nearby pipe can serve as a vent.
- What saves money: Catching the venting constraints before framing and tile decisions lock the layout in place.
Advanced Venting Scenarios for Kitchen and Bath Remodels
Some of the hardest venting work in Greater Boston isn't in large houses. It's in tight remodels where design expectations are high and pipe routes are awkward.
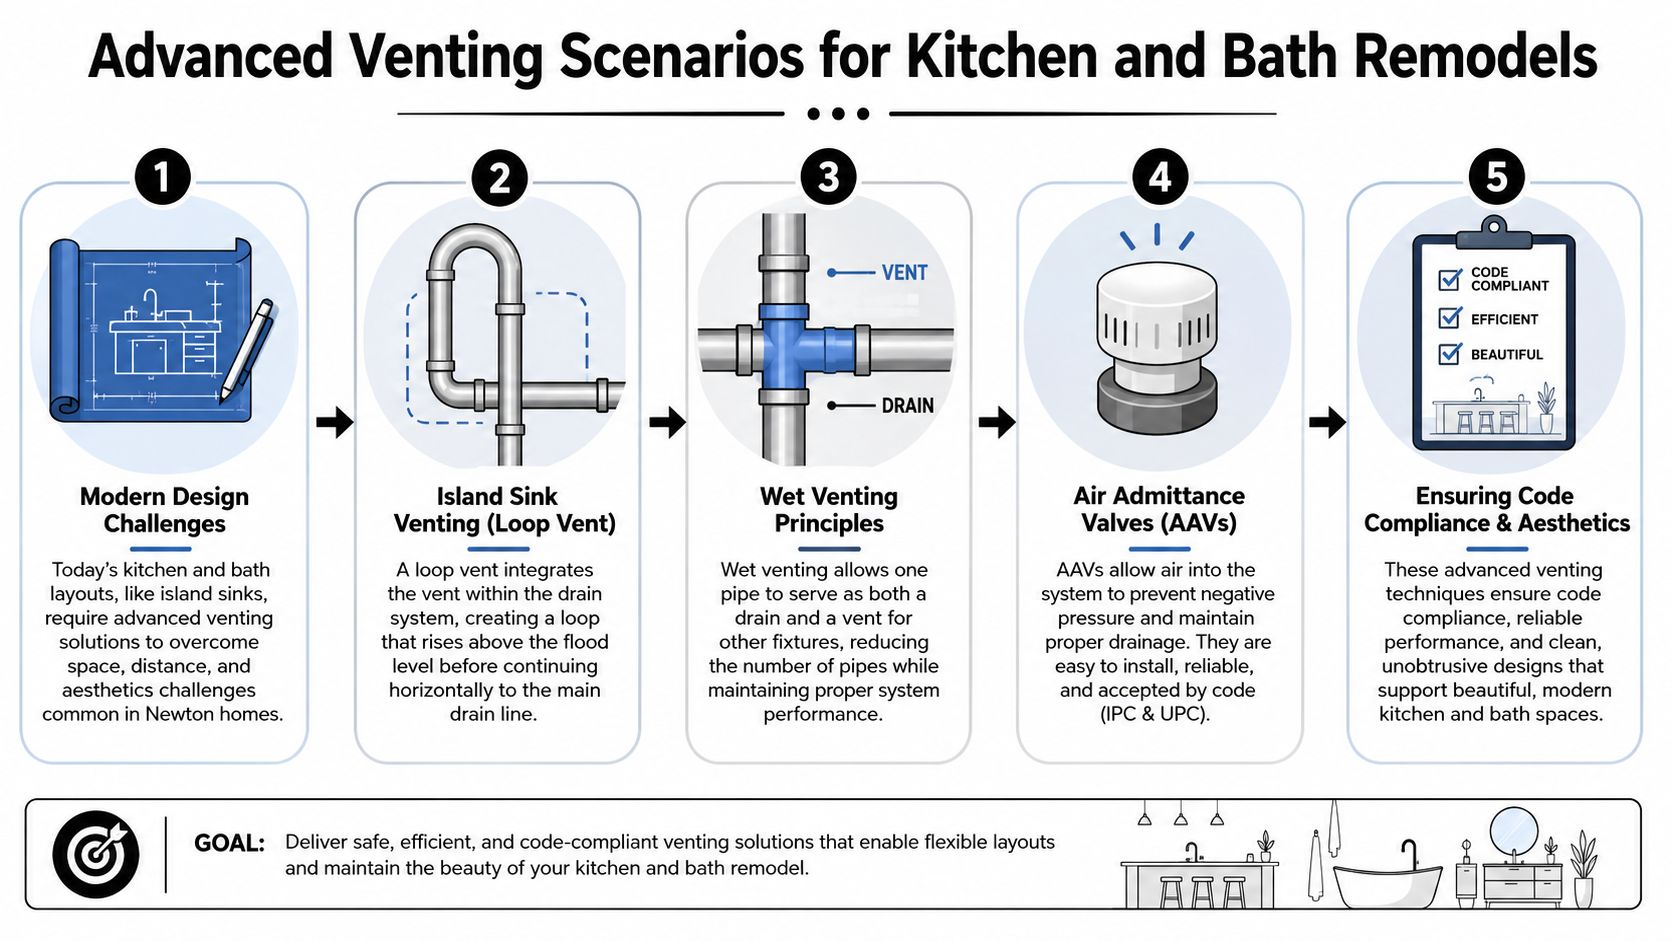
Kitchen islands in Newton and Brookline
A kitchen island sink in Newton sounds simple until you ask where the vent goes. There's no wall directly behind the fixture, and nobody wants a random pipe dropped where it doesn't belong. That's where a code-approved island venting method comes into play.
This comes up all the time in kitchen remodeling Newton, custom kitchen Belmont, and kitchen renovation Burlington work. Good island venting is about preserving airflow without compromising the design. Bad island venting is when someone tries to fake it with a shortcut that won't satisfy the layout or the inspector.
If you're also comparing fixture rough-in standards, this article on standard shower drain size helps clarify how the drain side of the system affects the vent side.
Wet venting in bathroom groups
Wet venting is one of the most useful code-approved tools in a bathroom remodel, especially when fixtures are grouped tightly. It allows one properly sized section of pipe to serve as a drain for one fixture and a vent for another, but only when the configuration and sizing follow the rules.
ASPE's summary of IPC guidance states that a wet vent must be at least 2 inches for 4 fixture units or less and at least 3 inches for 5 fixture units or more. It also states that a circuit vent must be at least 2 inches and located between the two most upstream fixture drains, according to the ASPE wet and circuit venting summary.
That's highly relevant in a bath-group redesign, an ADU build, or a second-floor addition where space inside joists and walls is limited. Wet venting can save space and simplify routing, but only when the entire group is planned correctly.
Where homeowners get misled
The biggest misconception is that any shared drain equals a wet vent. It doesn't. Wet venting is a specific code method with specific sizing and arrangement rules.
If a layout depends on wet venting, that method has to be designed intentionally. You can't back into it after the rough piping is already installed.
We also hear homeowners ask about AAVs for islands or remote fixtures because they've seen them online. Sometimes those devices get discussed as if they're a universal fix. They aren't. In Massachusetts, venting choices need to be checked against the local code framework, permit review, and inspector expectations.
How We Manage Plumbing Permits and Inspections in Massachusetts
In Massachusetts, moving or adding plumbing fixtures is permit work. That's true whether you're doing bathroom remodeling Somerville, a kitchen update in Lexington, or an accessory dwelling unit in Arlington.
The venting plan matters early because the plumbing permit, rough inspection, and framing sequence all depend on it. If vent routing changes after walls are framed or structural work is complete, the correction is rarely simple.
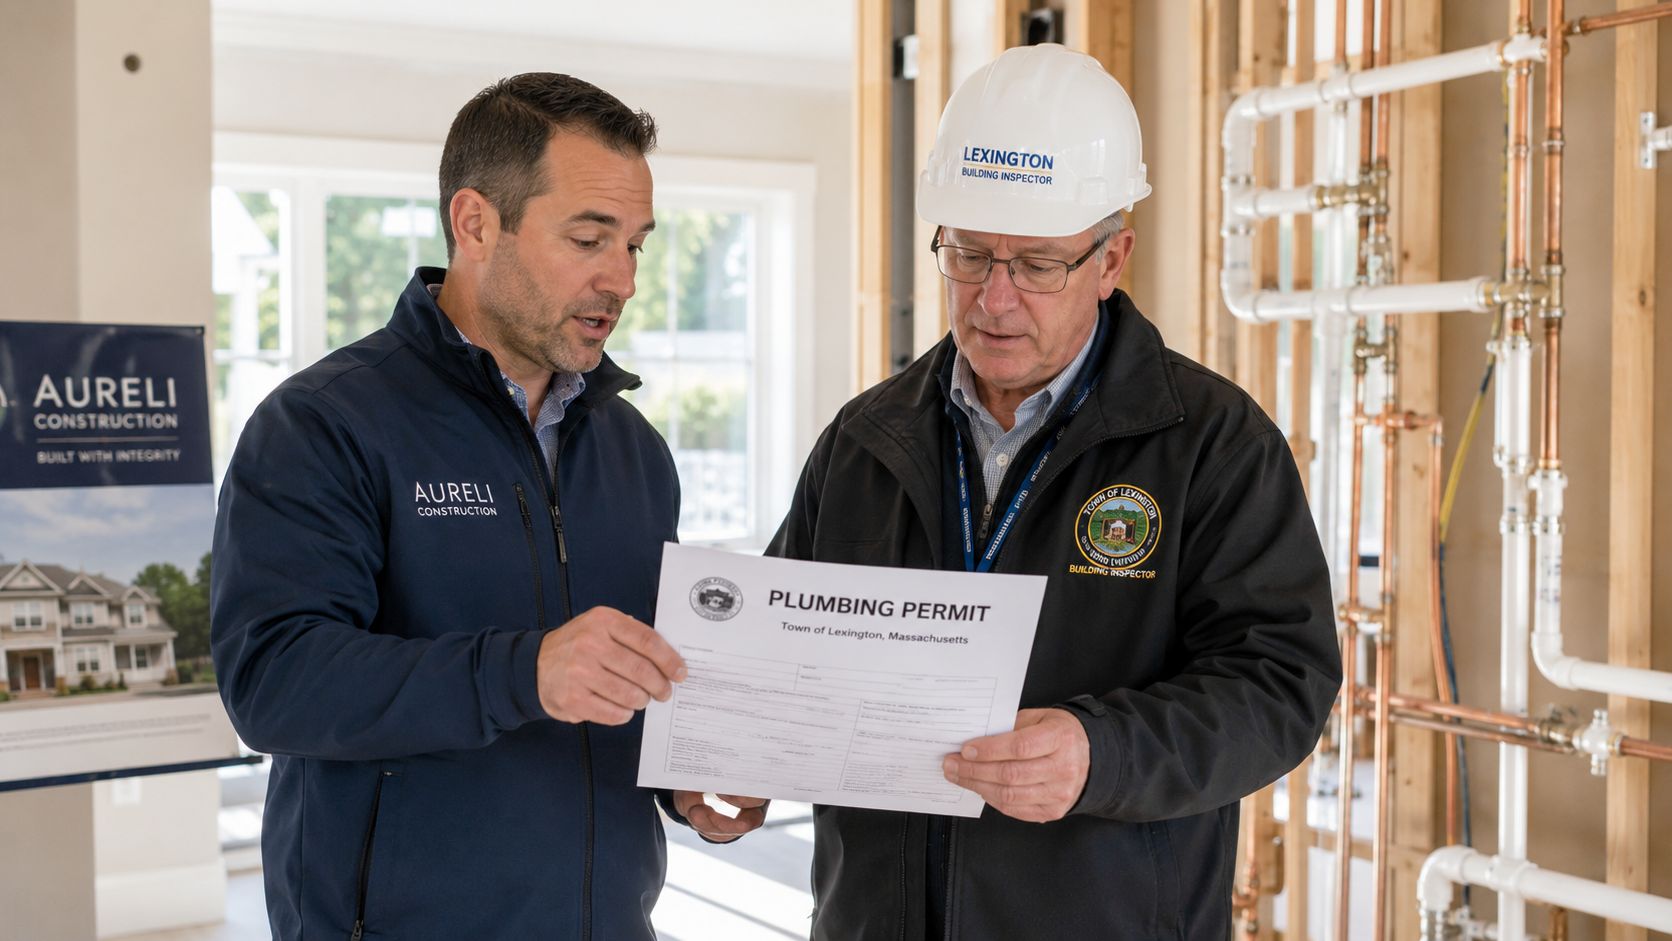
What gets reviewed before walls close
The rough plumbing inspection is where the town looks at the DWV system before insulation and drywall cover it. The inspector is looking at pipe sizing, routing, fittings, slope, vent connections, and whether the installed work matches the approved plan and Massachusetts code requirements.
For homeowners trying to understand the broader licensing side of construction and trades, this guide for home service professionals gives a useful overview of how state licensing requirements work. It's not Massachusetts-specific plumbing advice, but it helps explain why trade licensing and permit compliance matter.
A separate planning issue is timing. Building, plumbing, and electrical permits need to line up so the inspections happen in the right order. That's especially important in older homes where framing repairs, fire blocking, and plumbing revisions often overlap.
Why local coordination matters
Cambridge doesn't review jobs exactly like Newton. Brookline doesn't handle field conditions exactly like Medford. The underlying code framework is the same, but every town has its own process habits, paperwork expectations, and inspection cadence.
That's why homeowners benefit from a clear permit roadmap. If you want a better overview of how that process generally works, this explanation of the permitting process in Massachusetts is a good place to start.
- Before rough-in: Layout, stack tie-in strategy, and vent routing should already be resolved.
- At rough inspection: The visible piping has to support the code logic, not just look neat.
- Before final sign-off: Fixtures, trims, and completed work must match what was approved and installed.
A smooth inspection process usually comes from good planning, not luck.
Common Plumbing Venting Mistakes We Are Called to Fix
Most venting failures aren't dramatic. They're quiet mistakes buried in a wall or ceiling that create problems months later.
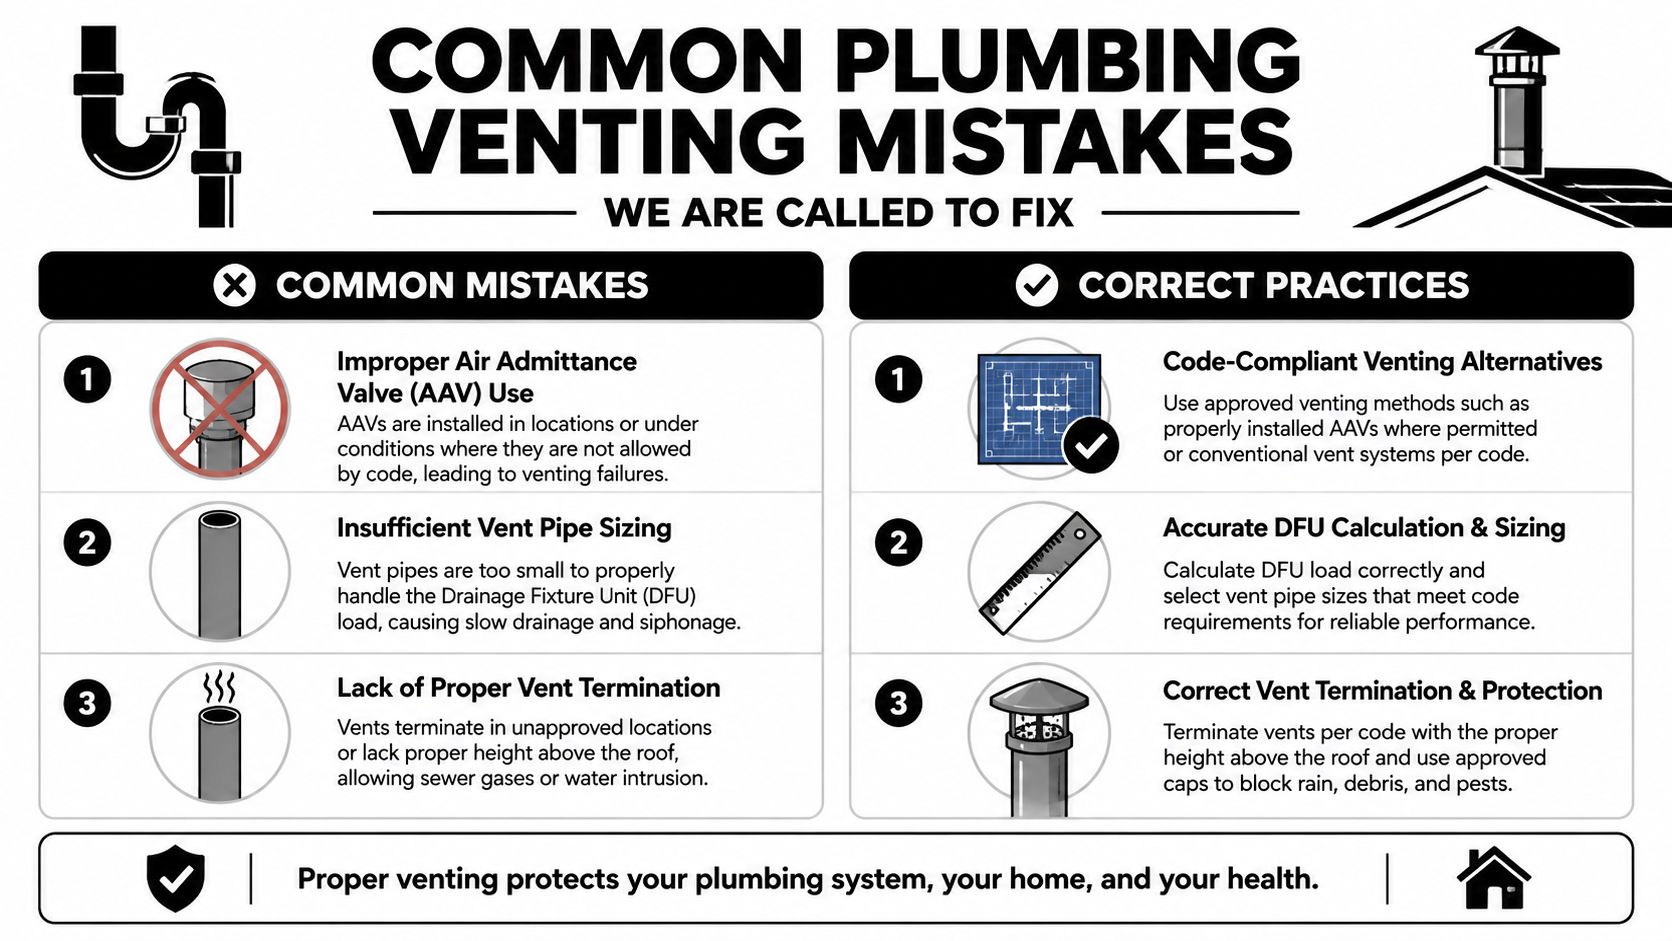
The shortcuts that fail inspection
One common issue is using an AAV where a proper vent design was required or where the installation conditions don't support that choice. Another is assuming the vent size only depends on the fixture and ignoring the total run length.
That second mistake shows up constantly in remodels and additions. The IPC minimum vent-pipe diameter is 1 1/4 inches, and when a vent exceeds 40 feet of developed length, it must increase by one nominal pipe size, as noted in this vent code explanation focused on practical remodel issues. In the field, that long-run issue matters more often than homeowners expect.
We also fix flat vents, poor tie-in locations, and vent terminations that were installed without enough attention to how the whole system breathes.
What works better
The repairs that hold up over time usually come from doing a few basic things right:
- Respect the route: The shortest legal vent path is often the best one.
- Size for the whole condition: Don't size from one fixture and ignore the branch, total load, or run length.
- Plan before finishes: Tile, cabinetry, and framing all become obstacles if the venting plan gets settled too late.
Most of the expensive vent fixes we see were cheap decisions at rough-in.
This is one of the main reasons homeowners comparing bids should ask how the contractor and plumber are handling venting, not just what fixtures are included.
Frequently Asked Questions About Plumbing Venting
Does adding or correcting vents increase bathroom remodel cost?
Yes. In Greater Boston, venting work can add real plumbing labor and open-wall complexity to a renovation, especially in older homes. The exact cost depends on access, fixture location, framing constraints, and whether existing noncompliant work has to be corrected.
What are the signs of a venting problem?
The usual homeowner complaints are gurgling drains, sewer odor, inconsistent toilet bowl water levels, and fixtures that drain poorly even when the drain line itself isn't obviously clogged.
Does every fixture need its own separate vent?
Not always. Every fixture needs proper venting, but some fixtures can share a vent through approved methods such as wet venting or other code-compliant configurations, depending on the layout.
Will a bathroom or kitchen venting change require a permit in Massachusetts?
In most remodel situations involving new or relocated plumbing fixtures, yes. Local building departments typically require permit review and inspections before the work is approved.
Can you hide venting problems during a remodel and deal with them later?
You can, but that's the expensive way to do it. Once framing, plaster, tile, and cabinets are in place, even a small vent correction can turn into a larger demolition and patching job.
Ready to get clear answers on your remodel layout, venting, permits, and code requirements in Cambridge, Newton, Somerville, Arlington, Belmont, Medford, Wellesley, and surrounding towns? Contact Aureli Construction for a free estimate.