In Arlington, Cambridge, and across Greater Boston, a lot of homeowners are dealing with the same basement problem right now. The floor feels cool and damp, the air smells musty after rain, and a dehumidifier has been running for weeks without really fixing anything.
That pattern is common in older Massachusetts homes, especially houses with stone or older concrete foundations, tight lot lines, and years of patchwork repairs. We see it in Arlington, Belmont, Brookline, Medford, Newton, Somerville, and Lexington all the time. The mistake is usually the same too. People try to solve a water problem with one product instead of treating the basement like a system.
Real basement moisture control starts outside the house and works inward. You control roof runoff, grading, and drainage first. Then you deal with seepage, slab-edge water, humidity, insulation, and finish materials in the right order. If you're planning to turn the space into living area, that order matters even more because Massachusetts permits, inspections, and 780 CMR code requirements come into play once framing, insulation, electrical, and egress are involved.
Table of Contents
- Why Your Arlington Basement is Damp and What to Do
- Diagnosing Moisture Sources in Your Massachusetts Home
- The First Line of Defense Exterior Water Management
- Interior Solutions for Persistent Water Issues
- Controlling Humidity for a Finished Basement in Medford
- DIY vs Pro A Cost and Permit Guide for Greater Boston
- FAQ Your Basement Moisture Control Questions Answered
Why Your Arlington Basement is Damp and What to Do
In Arlington and Belmont, the damp basement usually isn't coming from one single failure. It's a stack of conditions working together. Below-grade walls stay cooler than the rest of the house, older foundations often let in moisture, and New England weather keeps cycling between wet periods and humidity spikes.
The benchmark we use is simple. Basement relative humidity should stay below 50% because once it stays above that level, the risk of mold, odors, and material damage rises. That threshold and the systems approach behind it are consistent with the guidance summarized in this basement moisture control reference.
The three ways basements get wet
Most basement problems in this area come from some mix of these:
- Bulk water entry: Rainwater and groundwater move toward the foundation and get in through cracks, joints, window wells, or the wall-floor seam.
- Moisture moving through materials: Masonry and concrete can stay damp even when you never see a puddle.
- Condensation: Humid summer air hits cool basement walls, pipes, or slab surfaces and leaves water behind.
A musty smell doesn't tell you which one is happening. That's why shortcuts fail.
Practical rule: If a basement smells damp, don't buy equipment first. Figure out whether you're dealing with runoff, seepage, or humidity.
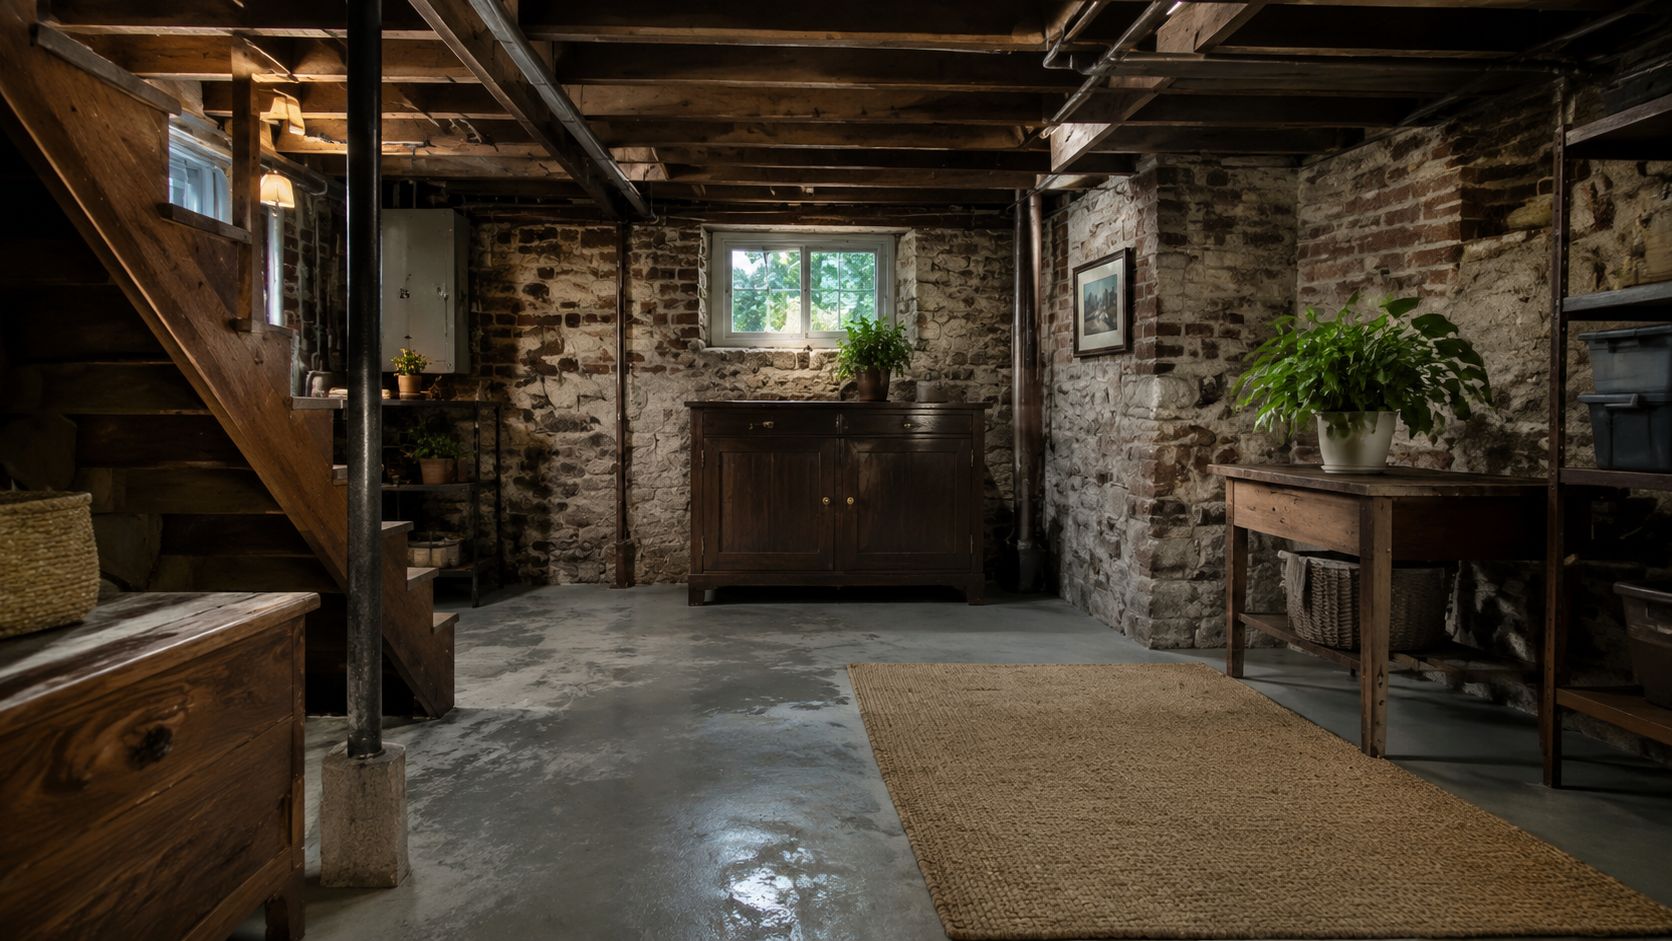
What works in older Greater Boston homes
In older houses, especially fieldstone and early concrete foundations, waterproof paint alone rarely solves anything for long. It can hide staining for a while, but it doesn't redirect water outside, relieve pressure under the slab, or lower indoor humidity enough on its own.
The right approach is layered:
- Fix roof runoff and yard drainage.
- Check where water collects around the foundation.
- Address seepage with drainage, not cosmetic coatings.
- Control humidity after water entry is under control.
- Finish the basement with materials that can handle a below-grade environment.
If you're planning living space, this also affects design decisions around insulation, egress, and permitting. A basement remodel in Massachusetts often triggers building, electrical, and sometimes plumbing permits, plus inspections before closeout. That's one reason we treat moisture control as the first phase, not an add-on.
Diagnosing Moisture Sources in Your Massachusetts Home
Before you spend money, you need a diagnosis that makes sense. A wet corner in a Newton basement after hard rain means something very different from condensation on ducts in Brookline during July.

Signs that point to the real source
Start with what you can see and when it happens.
- After rain only: Look hard at gutters, grading, downspouts, and window wells.
- At the wall-floor joint: That often points to water pressure at the perimeter.
- On pipes, ductwork, or cold surfaces in humid weather: That's usually condensation.
- Near a fixture or utility area: Don't rule out a plumbing leak.
White mineral residue on masonry tells you moisture has been moving through the wall. Stained drywall, peeling paint, swollen trim, and rust on metal fasteners tell you the moisture problem has been there for a while.
A few simple checks homeowners can do
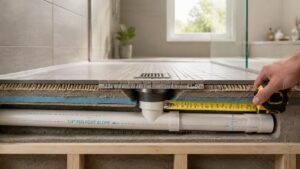
Tape a square of clear plastic to a masonry wall or slab and leave it in place. Moisture forming behind it points more toward moisture moving through the material. Moisture forming on the room side points more toward indoor humidity and condensation.
Walk the exterior next. Look for settled soil, downspouts dumping next to the foundation, or mulch built up too high against siding or masonry. In tight Cambridge and Somerville lots, even one bad discharge point can keep a foundation wet.
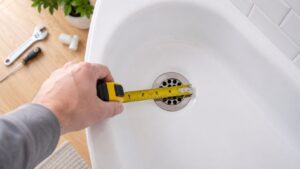
If you're using a meter, make sure you know what the readings mean before you trust them. This guide on how to decipher moisture meter scales helps homeowners make better sense of what they're seeing on different materials.
Damp walls and humid air are not the same problem. They can happen at the same time, but they don't get fixed the same way.
What we look for during a site visit
We don't just inspect the basement. We look at the whole water path.
That means roof edges, splash zones, grade, steps, patios, driveway pitch, foundation cracks, old patch repairs, mechanical ventilation, and the current finish assembly if the basement is already partly finished. If the house has a fieldstone foundation, we also look at mortar condition and past parging because those details affect how moisture shows up inside.
A useful diagnosis should tell you what to do first, what can wait, and what won't work at all.
The First Line of Defense Exterior Water Management
If water is being directed toward the house, interior products are just coping tools. They aren't a first fix. Exterior water management is where most good basement moisture control starts.
Federal and industry guidance has long treated grading and site drainage as core practice. The ground should slope away from the foundation by at least 6 inches for every 10 feet, and basement floors are traditionally kept 3 to 4 feet above the water table depending on the standard. That summary is reflected in this basement drainage guidance.
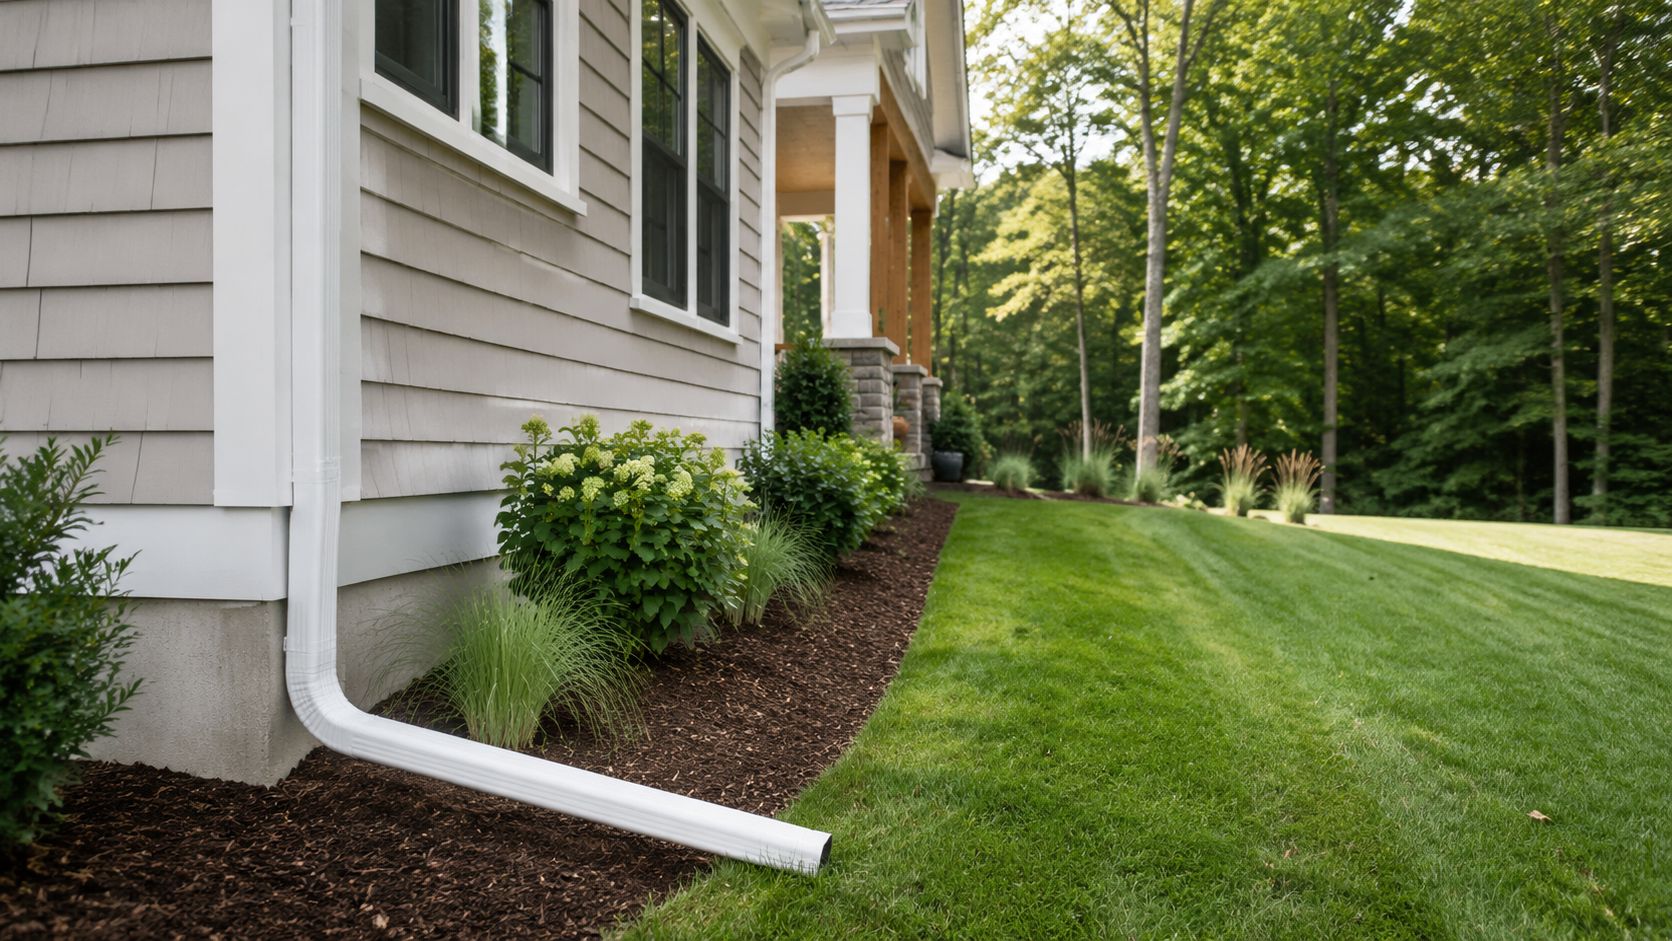
Start with the roofline and grade
A lot of water problems start at the roof edge, not the basement wall.
Check these first:
- Gutters: If they're clogged or undersized, they dump water exactly where you don't want it.
- Downspouts: They should discharge away from the house, not into a flower bed against the wall.
- Grade: Soil should pitch away from the foundation, not flatten out or reverse.
- Hardscape: Walkways, patios, and driveway edges sometimes settle and send water back toward the house.
For a deeper explanation of why runoff control matters so much in this climate, we often point homeowners to our guide on why rainwater management is essential for Massachusetts homeowners.
Older homes also create odd drainage patterns. Granite steps, brick walks, retaining edges, and additions built decades apart can trap water in ways that aren't obvious until a storm hits. When walls or side yards need rebuilding as part of that drainage correction, details like clean stone and proper retaining wall backfill matter because the wrong fill holds water where you don't want it.
Water should never be given a reason to stop next to your foundation.
When exterior drainage needs real construction
Sometimes basic maintenance and minor grading are enough. Sometimes they aren't.
If runoff is controlled and the basement still takes on water, the next exterior tier may involve excavation, waterproofing membrane work, footing drainage, or reconstructing problem areas around entries and stairwells. On older Greater Boston properties, access can be tight and utilities can complicate excavation. That's why these jobs need planning before anyone starts digging.
Here's a useful visual on the outside-in approach and drainage basics:
The trade-off is cost and disruption versus long-term control. Exterior work is more invasive, but when bulk water is the main issue, it's usually the cleanest way to solve the actual cause instead of managing the symptom indoors.
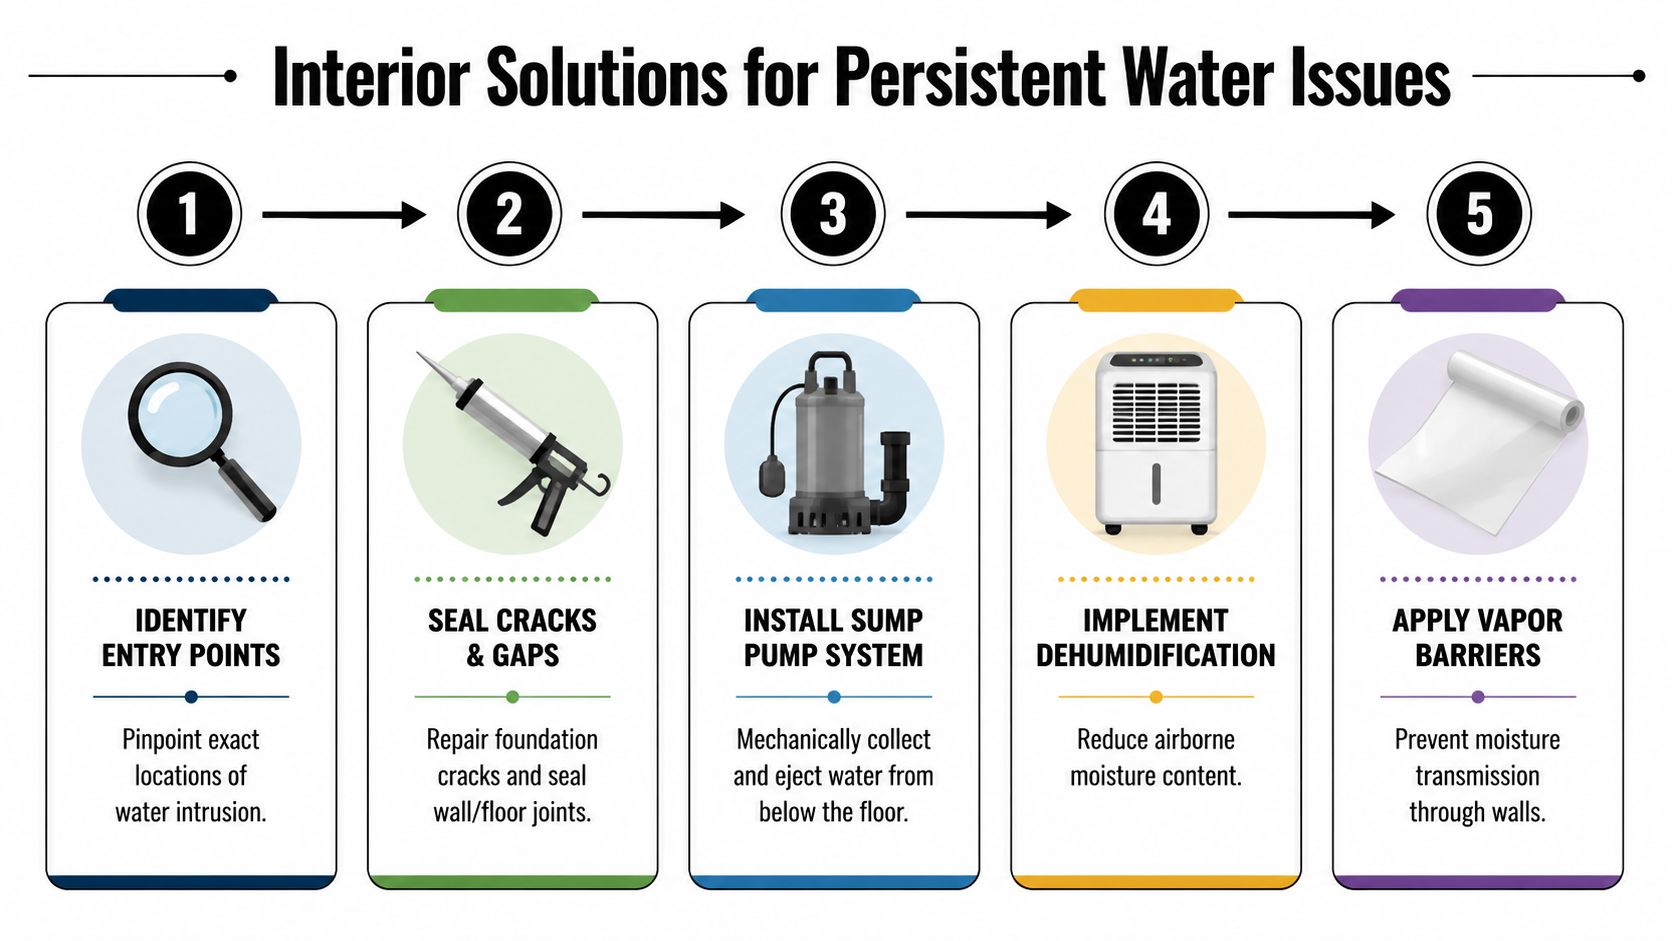
Interior Solutions for Persistent Water Issues
A lot of Greater Boston basements still take on water after the gutters are fixed and the grading is improved. I see it in Cambridge triples, Somerville attached homes, and older houses with fieldstone or mixed foundation walls where full exterior excavation is either impractical or too disruptive for the site. In those cases, interior water management is the next layer. It controls the water that still reaches the basement, instead of pretending it never will.
How Interior Drainage Works
An interior perimeter drain does one job. It intercepts seepage at the slab edge or wall base and directs it to a sump basin before that water spreads across the floor or pushes into finish materials.
That matters in older local homes because many foundations were never built with modern waterproofing or footing drains. Fieldstone walls, brick repairs, patched slabs, and high seasonal groundwater create a lot of small entry points. A coating on the inside face of the wall does not change that pressure. The water still has to go somewhere.
A typical interior system includes:
- A perimeter collection channel: Installed at the slab edge where seepage commonly shows up.
- Drainage stone or a formed drainage system: Keeps water moving toward the collection point.
- A sump basin and pump: Collects and discharges water away from the house.
- Discharge planning outside: The outlet has to carry water far enough away that it does not return to the foundation.
Interior drainage is a management system, not wall waterproofing. That distinction saves people money because it keeps the scope honest.
Where crack repair helps, and where it does not
Crack repair has a place. It is just not the whole plan in a basement with broad water pressure.
If one poured concrete wall crack leaks during heavy rain, epoxy or polyurethane injection can be a good targeted repair. If seepage shows up along multiple wall sections, at the cove joint, or through the slab, chasing individual cracks usually turns into repeated patchwork. The same is true for hydraulic cement and waterproof paint. Those products may slow minor seepage in isolated spots, but they do not relieve hydrostatic pressure below the slab or at the footing line.
That is the shortcut that fails in this region. The wall gets coated, the basement smells damp by August, and the owner is back to moving boxes away from the perimeter.
Sump systems need proper design
A sump pump is one component in a controlled drainage path. It is not a complete moisture strategy by itself.
Pump selection, basin size, check valves, discharge routing, and power supply all matter. In a finished or soon-to-be-finished basement, I also recommend thinking through service access before the walls go up. If the basin ends up buried behind trim and storage, maintenance gets skipped. Then the first failure happens during a storm.
For homeowners planning bigger work, it often makes sense to coordinate moisture control with a full Greater Boston basement finishing plan. Aureli Construction handles that scope as part of basement remodeling and finish work, where drainage, framing details, and finish materials are treated as one assembly instead of separate fixes.
Condensation can also confuse the diagnosis. Homeowners trying to understand and prevent household mould often discover that some staining or odor they blamed on wall leaks was being fed by humid indoor air hitting cool masonry.
If a sump system is part of the solution, the electrical work needs to be installed correctly and permitted where required. In Massachusetts, that becomes more important once you add dedicated power, change discharge routing, or fold the work into a larger remodel.
Controlling Humidity for a Finished Basement in Medford
A Medford homeowner finishes a basement, sets up a dehumidifier, and still gets that damp smell by July. I see this a lot in older Greater Boston homes. The space may look finished, but the assembly is still losing to moisture.
Finished basements need controlled humidity, warmer wall surfaces, and materials that can live next to masonry. In this region, that matters even more because many homes sit on old concrete or fieldstone foundations, and some neighborhoods deal with high seasonal groundwater. A dehumidifier can help, but it does not fix bulk water entry, humid air leaks, or condensation on cold foundation walls.
What a Dry Finished Basement Needs
For a basement people use every day, the goal is steady indoor humidity, not a machine running full time while the room still feels clammy. Once basement humidity gets too high, mold risk rises fast. That is why finish details matter as much as the equipment.
The right assembly usually includes:
- Rigid foam against foundation walls: This helps keep humid indoor air from hitting cold masonry and condensing.
- Vapor control placed correctly: The location depends on the wall and floor assembly. In older basements, the wrong layer in the wrong spot can trap moisture instead of controlling it.
- A dehumidifier sized for the space and the moisture load: If it never catches up, something upstream is still wrong.
- Air sealing at rim joists, pipe penetrations, and other leakage points: Warm summer air finds those gaps and feeds condensation inside finished cavities.
Homeowners trying to understand and prevent household mould are often dealing with this exact mix of hidden humidity and cool basement surfaces.
What to expect before finishing work starts
Before any framing or flooring goes in, the basement needs to behave like an interior space. In Medford, Arlington, and similar towns, that means more than checking for puddles after a storm. We look at wall condition, slab condition, past water staining, rim joist leakage, and how the foundation type affects drying. A fieldstone foundation does not get finished the same way as a newer poured wall.
Shortcuts frequently fail in older Boston-area housing stock. If exterior runoff is still loading the foundation, or if the walls are pulling moisture inward seasonally, covering everything with drywall just hides the problem until the first humid summer. Then you get musty insulation, stained base trim, cupped flooring, and callbacks that cost more than doing the moisture work first.
Under 780 CMR and the Massachusetts State Building Code, basement finishing can trigger permit review for framing, insulation, electrical, and sometimes egress, depending on scope. Rough and final inspections are part of the process.
If you're planning larger work, this guide to basement finishing in Greater Boston explains how moisture control, insulation, layout, and finish materials need to work together.
A finished basement should stay stable through a wet spring and a Boston summer. If the moisture plan only starts after the walls are closed up, it is already late.
DIY vs Pro A Cost and Permit Guide for Greater Boston
Some basement moisture work is realistic for a homeowner. Some of it isn't. The line is usually clearer than people think.
What homeowners can usually handle
DIY work is fine for basic maintenance and observation.
- Clean gutters and check discharge paths: If roof water is spilling over, fix that first.
- Add simple downspout extensions: This is often low-cost and worth doing.
- Regrade minor surface areas: A shovel, rake, and wheelbarrow can help where the slope is obviously wrong.
- Run a dehumidifier as a temporary support: Useful while you're diagnosing, not as a substitute for drainage work.
- Monitor conditions: Track when the basement gets damp and where it starts.
What belongs with a licensed contractor
Professional work starts when the fix affects structure, excavation, drainage systems, or permitted trades.
- Excavation and exterior waterproofing
- Interior perimeter drainage
- Sump pump installation and discharge work
- Foundation crack injection where water entry is active
- Basement finishing after moisture control
- Electrical and plumbing changes tied to the basement
In Massachusetts, permit requirements depend on scope, but once you're adding electrical service for a sump, altering structural or foundation-related conditions, or building finished living area, expect building permits and trade permits. Inspections typically include rough and final stages. We manage that process with local building departments across Greater Boston.
Basement moisture control costs in Greater Boston
| Solution | Typical Cost Range | Scope |
|---|---|---|
| Gutter cleaning, downspout extensions, minor grading | $500 to $2,500 | Basic exterior water management and runoff correction |
| Crack repair and targeted seepage repair | $1,500 to $4,500 | Isolated foundation cracks or localized trouble spots |
| Interior perimeter drain and sump pump system | $8,000 to $18,000 | Interior water collection, sump basin, pump, and slab-edge drainage |
| Exterior excavation and foundation waterproofing | $15,000 to $40,000+ | Excavation, membrane work, drainage improvements, and backfill |
| Basement finishing after moisture correction | $60,000 to $150,000+ | Full basement remodel with insulation, framing, electrical, finishes, and code compliance |
If the project includes a bedroom or habitable sleeping area, egress requirements become a major design and permit issue. Our guide to basement egress window requirements is a good place to start before budgeting finished space.
FAQ Your Basement Moisture Control Questions Answered
How long does basement moisture control take
It depends on the source of the water and the scope of the fix. A gutter correction or downspout extension can be handled fast. An interior drain, sump installation, or exterior excavation takes longer because the work includes setup, demolition, drainage work, cleanup, and in many towns, inspections.
In older Greater Boston homes, diagnosis often takes time too. A fieldstone foundation, a buried old patch, or years of regrading around the house can change the repair plan once conditions are exposed. If you plan to finish the basement, complete the moisture work first and give it time to prove out through real weather.
Will fixing moisture also get rid of the musty smell
In many cases, yes. Musty basement odor is often tied to damp framing, wet contents, old carpet, or air that stays too humid for too long.
The smell does not leave just because a dehumidifier is running. The water entry has to be addressed first, then the basement needs to dry out, and any mold-damaged or odor-holding materials may need to be removed. In a finished basement, that can mean drywall, trim, insulation, or flooring if they stayed wet long enough.
Can you fix a fieldstone basement
Yes, but it takes a different approach than a poured concrete wall. A lot of Boston-area basements have stone foundations that were never built to stay bone dry by modern finished-space standards.
Those basements respond better to a system that manages water than to surface coatings that promise to block it. Start outside with roof drainage, grading, and runoff control. Then evaluate whether the foundation needs repointing, drainage improvements, or an interior collection system. Paint-on waterproofing is one of the more common dead ends I see on fieldstone walls.
What happens if you uncover more issues during the work
That is common in older houses. Once finishes come off or excavation starts, we sometimes find failed old repairs, hidden cracks, rotted framing, or signs that water has been moving through more than one path.
The right response is straightforward. Document the condition, explain what changed, price the added scope, and get approval before the work continues. That keeps the project clear for the homeowner and avoids the shortcut repairs that cause the same basement to get wet again.
Do I need a dehumidifier forever
Not in every basement, but many Greater Boston basements benefit from one even after the main water problem is fixed. High summer humidity, cool foundation walls, and older construction make these spaces prone to damp air.
Use the dehumidifier as one part of the system. It helps control residual humidity, especially in a finished basement, but it should not be asked to make up for poor grading, short downspouts, seepage at the wall-floor joint, or a foundation that still takes on bulk water.
Ready to get your basement fixed the right way? Contact Aureli Construction for a free estimate. We help homeowners in Cambridge, Arlington, Belmont, Medford, Lexington, Newton, Somerville, Wellesley, and surrounding Greater Boston towns diagnose wet basement problems, handle permits, and build moisture-controlled basement spaces that are ready for real use.