In Somerville and Cambridge, we see this all the time. A homeowner has a slow tub drain, a stained ceiling below, or an old stopper that won't seal anymore, and the first instinct is to buy a replacement kit online before checking the one measurement that decides whether the repair will work.
That's where people get into trouble. Tub drains look simple from above, but in older Greater Boston homes, small differences in the tub opening, overflow alignment, and assembly length can turn a quick swap into a leak behind the wall or under the floor. If you're trying to figure out how to measure tub drain size, the goal isn't just getting a number. The goal is getting the right number for the right part, and understanding when a small plumbing repair is really pointing toward a larger bathroom update.
As a Massachusetts licensed general contractor, we deal with this during bathroom renovation planning in Brookline, Newton, Belmont, Cambridge, and surrounding towns all the time. We also have to think beyond the drain trim itself. If plumbing changes move behind the wall or under the tub, permit and inspection requirements can come into play under the MA State Building Code and local inspection process.
Table of Contents
- Your Guide to Measuring a Tub Drain in Massachusetts
- Before You Begin Tools and Common Tub Drain Types
- How to Take Accurate Tub Drain Measurements
- Using Your Measurements A Contractor's Perspective in Newton MA
- Troubleshooting Common Tub Drain Issues
- Bathroom Renovation and Plumbing FAQs
Your Guide to Measuring a Tub Drain in Massachusetts
In a lot of older Somerville two-families and Cambridge condos, the bathroom looks fine until you touch the drain assembly. Then the flange is frozen, the overflow plate is crooked, the tub floor is slightly worn around the opening, and suddenly a basic repair isn't basic anymore.
That's why we treat drain measurement as part of the larger bathroom picture, not just a parts order. If the tub is staying, accurate measuring helps you avoid buying the wrong trim or waste-and-overflow kit. If the bathroom is being renovated, those same measurements tell us whether the existing plumbing layout is worth keeping or whether it makes more sense to open things up and redo it properly.
Practical rule: Measure before you shop, and inspect before you assume.
Homeowners often call us after they've already bought a “universal” kit that doesn't line up with the overflow or doesn't seat correctly at the tub floor. In Brookline and Newton, especially in older homes, that mismatch can mean more than inconvenience. It can mean hidden water damage, a bad seal, or a plumbing change that needs to be done under permit if the work expands beyond a simple like-for-like swap.
A tub drain measurement also matters in the bigger context of bathroom remodeling Somerville or bathroom renovation Newton planning. If we're rebuilding the bathroom, we want to know early whether the tub is standard, whether the overflow height is workable, and whether the rough plumbing will pass inspection cleanly once walls are open. Those details affect schedule, material ordering, and the sequence of plumbing, tile, and finish work.
Before You Begin Tools and Common Tub Drain Types
Before you measure anything, set yourself up so you're not guessing in bad light with water still sitting in the tub. You don't need a full plumber's truck for this, but you do need a few basic tools and a clear look at the hardware.
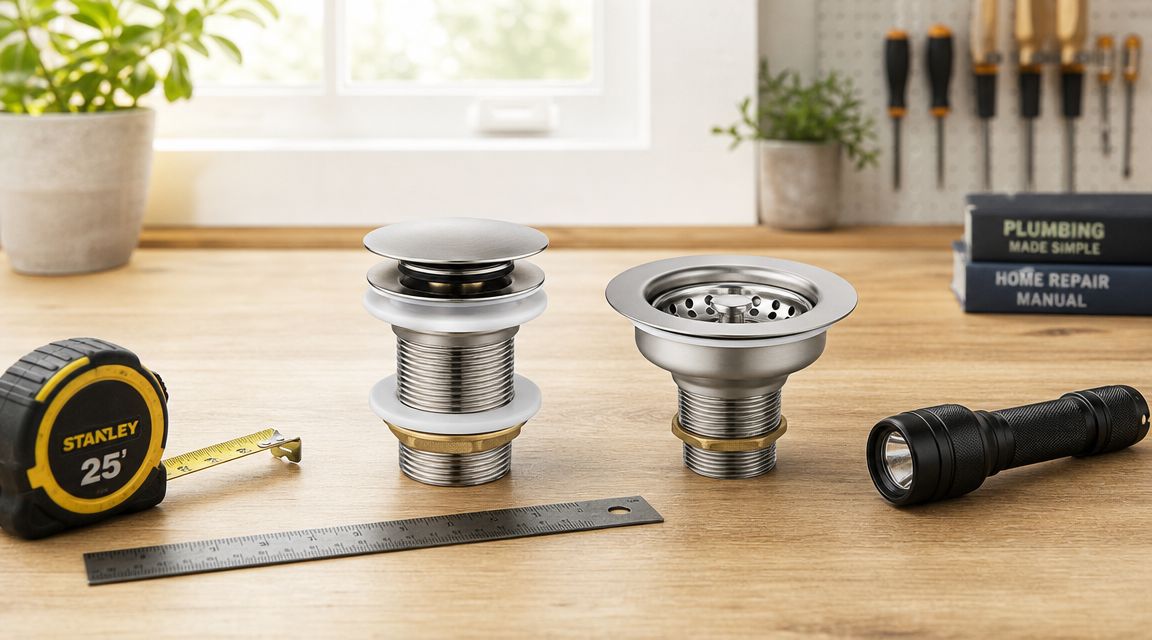
Tools We Recommend
Keep it simple:
- Flexible tape measure: Best for measuring across the tub opening and checking the overflow position.
- Flashlight or headlamp: You need direct light inside the drain and around the overflow plate.
- Flathead screwdriver: Helpful for trim removal on some assemblies.
- Notepad or phone: Record each dimension as you go. Don't rely on memory.
- Small rag or paper towel: Wipe away residue so you can see the true edge of the opening.
If you have access behind the tub through a panel or from below, that helps. If not, you can still gather most of the important information from inside the tub.
The Drain Types You'll Usually Find
Most homeowners in Greater Boston run into one of these setups:
- Lift-and-turn: There's a small knob on top. You lift and rotate it to open or close the stopper.
- Toe-touch or push-down: You press it with your foot or finger. It clicks open and shut.
- Trip-lever: The control is at the overflow plate. A lever operates the stopper or internal linkage.
Each one comes apart differently. That matters because homeowners often start forcing parts without knowing what style they have, and that's how trim gets scratched or older fittings get damaged.
If the stopper type isn't obvious, slow down and identify the mechanism before removing anything. That one minute saves a lot of frustration.
How to Take Accurate Tub Drain Measurements
A tub drain measurement usually gets tested after the wall is open, the new trim is on site, and everyone wants the plumbing to drop into place. If the numbers are off by even a small amount, the waste and overflow can fight the tub, the shoe can sit crooked, and a simple swap can turn into extra labor during a Brookline or Newton bathroom remodel.
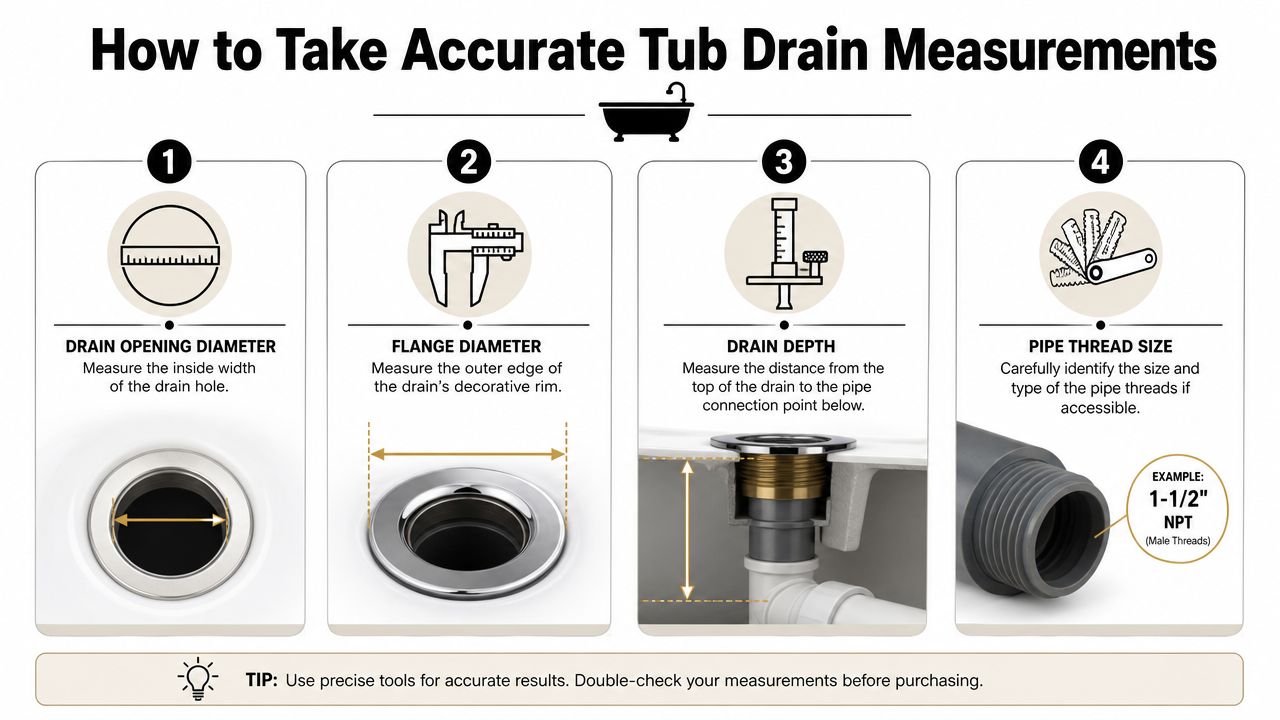
Start with the drain opening at the bottom of the tub. Measure the actual hole from inside edge to inside edge. Do not measure the visible flange, trim ring, or stopper cap. Those parts mislead homeowners all the time, especially on older tubs where replacement trim was installed years after the original drain body. For a general sizing reference, this bathtub drain sizing guide shows the common range you'll run into.
We also check the condition of the opening while we measure it. On an older cast iron or steel tub, the hole may not be perfectly round, and chipped enamel around the drain can affect how well the gasket seals. That matters during a renovation because a drain that technically fits can still leak if the seating surface is rough or distorted.
After that, measure the center of the drain to the center of the overflow. This is the number that decides whether a standard waste and overflow assembly will line up cleanly or whether you need an adjustable or specialty setup. If that distance is wrong, the parts may thread together under tension, and that is where leaks start showing up after the tub goes back into service.
Use this sequence:
-
Measure the drain opening
Set the tape across the inside of the drain hole at the tub floor. Record the widest inside-edge measurement. -
Measure center to center
Find the center of the drain opening and the center of the overflow plate, then measure between them. This controls alignment for the full drain assembly. -
Measure the tub depth at the drain wall
Measure from the bottom of the tub up toward the overflow area using a straight reference. Curved tub walls can throw this off if you eyeball it, so keep the tape steady and write the number down. -
Check the drain shoe reach
If you have access behind or below the tub, measure how far the shoe needs to reach from the drain opening to the waste connection. This helps confirm whether the replacement parts will sit naturally or need adjustment. -
Note the stopper and overflow style
Record whether you have a lift-and-turn, toe-touch, or trip-lever setup. The trim style affects what replacement kits will work and how much can be reused.
On remodel work, we write all five measurements down before ordering anything. That protects the schedule and cuts down on return trips. It also helps us catch situations where the tub itself is staying, but the rough plumbing should still be corrected while the room is open.
A useful comparison is our guide on standard shower drain size requirements and layout differences. Homeowners often assume tub and shower drains are measured the same way. They are not. A tub adds the overflow relationship, and that one detail changes the whole assembly.
Massachusetts code and local inspection practice also affect how we handle these numbers. In many remodels, once piping is being altered behind the wall or below the floor, the job stops being a simple parts replacement and becomes plumbing work that has to be installed correctly, documented correctly, and ready for inspection. Accurate measurements help avoid forcing parts to fit, which is exactly the kind of shortcut that creates problems later.
For larger bathroom projects, we also use tools like Exayard plumbing estimating software to organize fixture specs, rough plumbing scope, and material planning before the crew starts ordering assemblies.
Do not accept a close-enough fit. If the drain and overflow are under stress during installation, the leak usually shows up after the ceiling below is finished.
If you want a visual walk-through before taking your own measurements, this video gives a useful overview of tub drain replacement and access:
Using Your Measurements A Contractor's Perspective in Newton MA
Once we have the numbers, the work shifts from measuring to interpreting. That's where contractor experience matters, especially on bathroom remodeling Newton jobs where the drain isn't an isolated repair but part of a full plumbing rough-in.
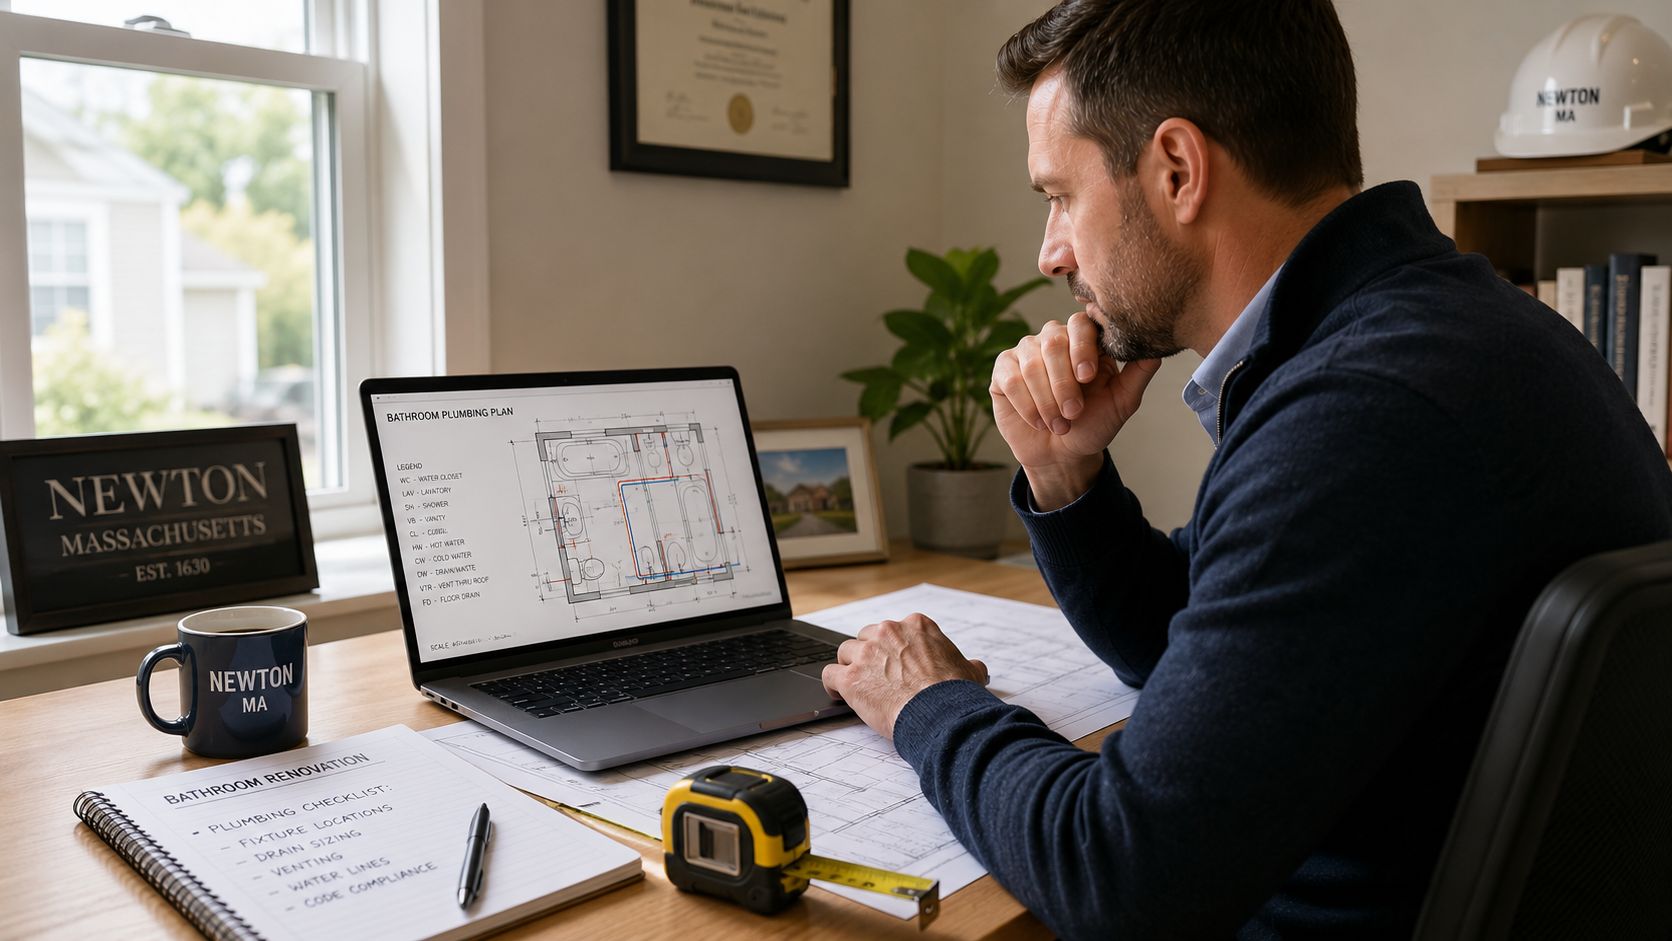
What the Numbers Tell Us on a Remodel
A homeowner usually sees a parts question. We see a planning question.
If the tub opening and overflow relationship point to a standard replacement, great. If they suggest a specialty tub, a non-standard older fixture, or a rough plumbing conflict, that affects how we scope the bathroom renovation. In Newton and Brookline, once we touch piping behind the wall or under the floor, we also have to think about permit coordination, inspection timing, and whether the final installation will meet Massachusetts code requirements under the local building department process and applicable plumbing rules.
This is also where estimating and sequencing matter. On larger jobs, teams often use structured takeoff and budgeting tools such as Exayard plumbing estimating software to organize fixture counts, rough plumbing scope, and material planning before work starts. The software doesn't replace field judgment, but it does show how seriously professionals treat even small plumbing components during a remodel.
Where Homeowners Usually Get Stuck
Most DIY issues happen in one of three places:
- They measured the wrong thing: Usually the flange instead of the opening.
- They bought by appearance: Matching finish but not matching fit.
- They underestimated the assembly: The drain looked simple from above, but the overflow spacing or shoe length didn't cooperate.
When we're already handling a broader project, those measurements feed directly into design-build planning. For homeowners comparing renovation options, our work on design-build remodeling in Newton MA is a good example of how plumbing details get coordinated with layout, finishes, and permitting instead of treated as isolated fixes.
A correct measurement is only half the job. The other half is knowing what that measurement means once walls open up.
Troubleshooting Common Tub Drain Issues
In Brookline, Belmont, and older parts of Cambridge, the measurement process often uncovers problems that have been hiding for years. The drain flange won't move. The opening is worn. The overflow doesn't sit flat. Or the piping below has corrosion that nobody could see from inside the tub.
When to Stop the DIY Repair
There's a clear point where a careful homeowner should stop and call a pro.
- The flange is seized hard: Forcing it can crack an older tub or damage the finish around the opening.
- The opening doesn't match available kits: That usually means you're dealing with an older or specialty setup.
- You see rust, staining, or soft subfloor conditions: The plumbing issue may already have become a framing or moisture problem.
- The pipe itself looks compromised: A trim replacement won't solve a leaking drain line.
If the symptom is slow drainage and you're trying to rule out a basic clog first, even advice from outside Massachusetts can still be useful at a general level. This Los Angeles plumbing advice for clogs covers simple drain-clearing basics that can help you distinguish between blockage and hardware failure before you start removing parts.
The key is restraint. A stuck tub drain in an old home is not the place for brute force. Once the issue moves beyond removable trim and into piping, hidden water damage, or non-standard hardware, the repair needs to be approached as plumbing work, not just maintenance. That's often the point where homeowners shift from a patch to a full bathroom renovation Belmont plan so the whole assembly can be rebuilt correctly.
Bathroom Renovation and Plumbing FAQs
Homeowners usually start by asking how to measure tub drain size, but the next questions are almost always about permits, remodel scope, and who should handle the job.
Do I need a permit to replace a tub drain in Massachusetts
For a simple trim or stopper replacement, you may not need one. If the work expands into replacing piping, changing the waste-and-overflow assembly behind finished surfaces, or modifying the plumbing layout, permit requirements can apply through the local building department and inspection process tied to the MA State Building Code and related trade permits.
We always recommend checking the scope before work starts. A simple repair can stay simple. Once the wall opens or the plumbing changes, the rules change with it.
How much does a bathroom remodel cost in Greater Boston
For practical planning purposes, many homeowners in the Boston area should expect a straightforward bathroom remodel to start around $25,000, while a larger or more finish-driven primary bath can exceed $60,000, especially in towns like Wellesley or Lexington.
That range depends on tile selection, fixture quality, waterproofing scope, layout changes, and whether plumbing and electrical work stay in place or move. If you're early in the process, our bathroom remodeling services page gives a clearer picture of how we approach full-scope renovation work.
Should I hire a plumber or a general contractor
If the issue is isolated and limited to plumbing, a licensed plumber may be the right first call. If the tub drain problem is part of a larger bathroom update involving tile, waterproofing, finishes, ventilation, or layout changes, a general contractor manages the full sequence and coordinates the licensed trades.
That matters because bathroom work doesn't happen in separate boxes. The drain affects the tub. The tub affects the wall finish. The wall finish affects waterproofing. The inspections depend on all of it being done in the right order.
Can I stay in the house during the work
Usually, yes, if there's another working bathroom. For a one-bath home, that conversation needs to happen early because even a modest renovation can disrupt daily routines fast.
We talk through access, dust control, material staging, and shutdown windows before demolition starts. That keeps the job organized and reduces surprises once the room is opened up.
What if we find hidden damage after the tub comes out
That's common enough that every homeowner should expect the possibility. We may find old water damage, framing repairs, outdated plumbing, or subfloor issues once the tub and drain assembly are removed.
When that happens, the right approach is a documented change in scope, not an on-the-fly shortcut. That protects the finished bathroom and keeps the work aligned with inspection and code requirements.
Ready to sort out a tub drain issue or plan a full bathroom renovation in Cambridge, Newton, Brookline, Arlington, Belmont, Somerville, or elsewhere in Greater Boston? Contact Aureli Construction for a free estimate at homeadditionma.com.