
In Arlington MA, we hear the same thing from homeowners all the time. The kitchen feels tight, the work triangle is awkward, and everyone still ends up gathering around the same cramped spot. A kitchen renovation with island fixes that fast when the room can support it, and in Greater Boston we build islands to work hard, not just look good.
The best kitchen renovation ideas with island do more than add counter space. They improve circulation, create a real prep zone, and give you a place for seating, storage, or appliances without wasting square footage. Houzz's 2025 U.S. Kitchen Trends Study shows how central islands have become, with 58% of renovating homeowners either adding or upgrading one, and more than 9 in 10 installing new light fixtures above the island, which tells you the island is now the centerpiece, not an afterthought (Houzz 2025 U.S. Kitchen Trends Study).
We also know the local reality. Massachusetts kitchens have to work under the MA State Building Code, 780 CMR, plus electrical, plumbing, and sometimes zoning review when the layout changes. In Newton, Belmont, Cambridge, and the rest of our service area, we plan every island around code, clearances, and how the room gets used.
Table of Contents
- 1. Open-Concept Island with Integrated Seating
- 2. Multi-Functional Island with Built-In Appliances
- 3. Waterfall Edge Island with Statement Countertop
- 4. Tiered or Two-Level Island with Bar Height Distinction
- 5. Island with Integrated Storage and Shelving
- 6. Curved or Rounded Island Edge for Modern Comfort
- 7. Island with Integrated Sink and Dishwashing Station
- 8. Regional Code, Cost, and Fabrication Notes for Kitchen Islands
- 8-Point Kitchen Island Renovation Comparison
- What to Expect from a Kitchen Remodel Contractor in Newton MA
1. Open-Concept Island with Integrated Seating
In a Cambridge colonial, this is often the smartest move. We open the sightlines, drop upper cabinetry where it would block the view, and build a clean island that lets the cook stay part of the room instead of facing a wall. That setup works especially well when you want the kitchen to flow into a dining area or family room without losing function.
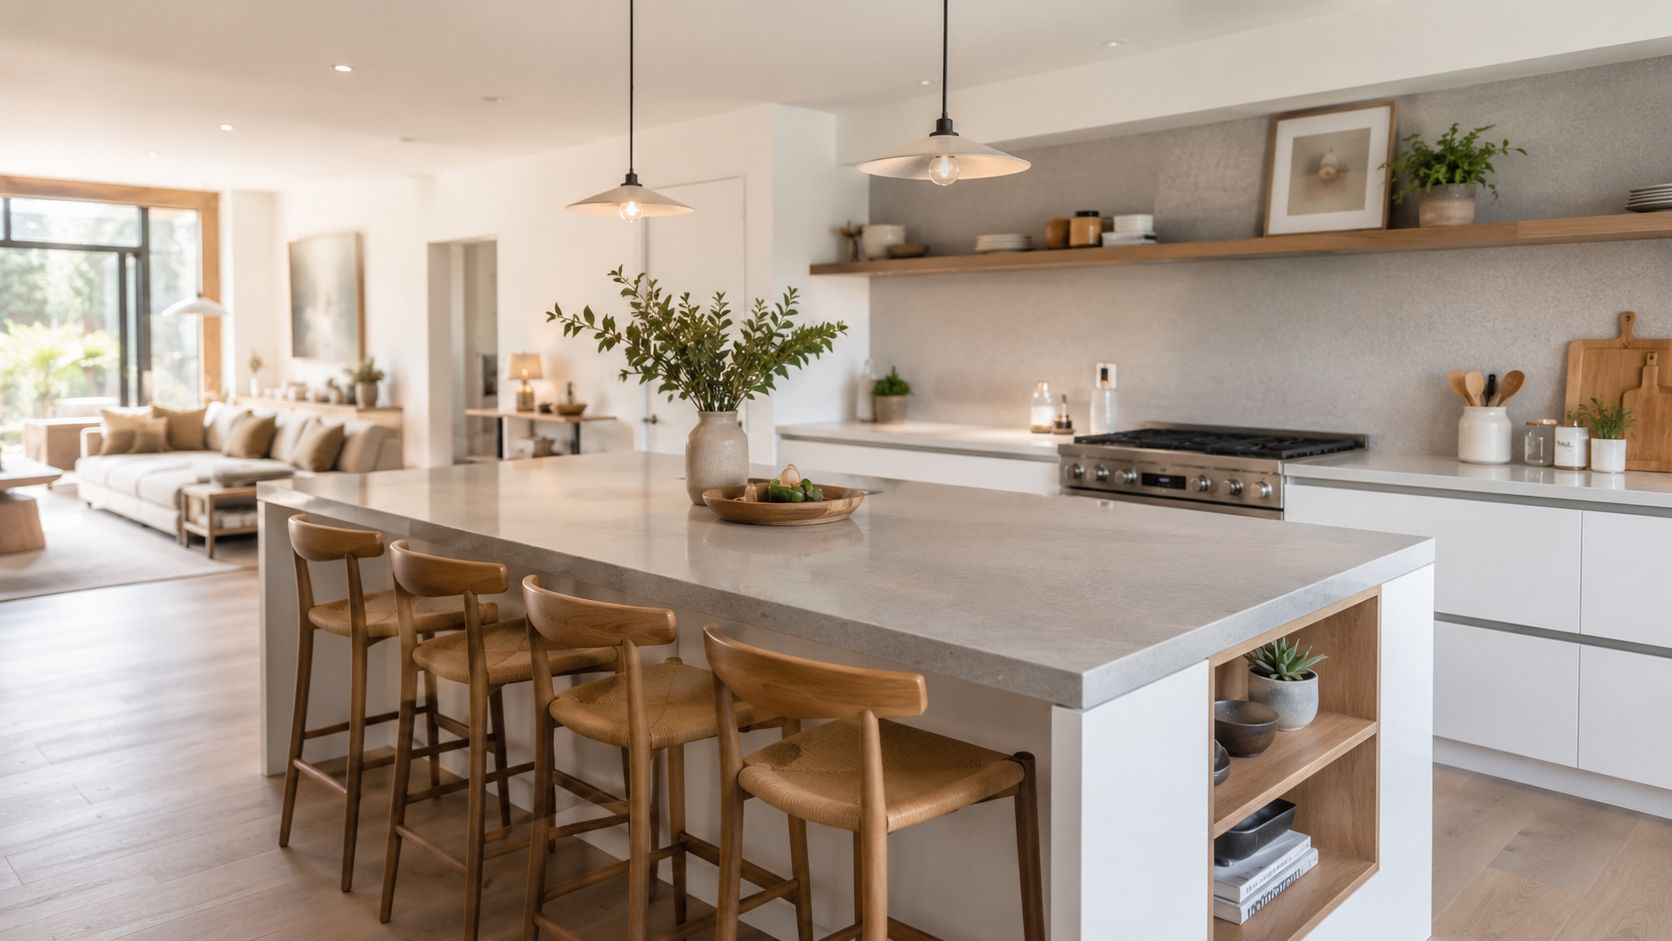
We usually recommend seating for three or four only when the room can support it. A standard 36-inch-high counter works well with 30-inch stools, while a 42-inch bar-height edge typically calls for 24-inch stools. If the island is doing double duty as a dining ledge and a prep surface, we keep the finishes durable, because that top gets hit from both sides all day.
Practical rule: If the walkway feels tight before the island goes in, it will feel worse after the island is built. We size the island to the room, not the other way around.
For clearance, we follow the practical guidance homeowners live with. The National Kitchen and Bath Association guidance echoed in design reporting calls for at least 42 inches of clearance on all sides of an island, and 48 inches when two or more people cook at once (design guidance summary). That matters in older homes across Somerville and Brookline, where every inch counts.
We also plan power early. Outlets, device charging, and task lighting all belong in the rough-in stage, not as a last-minute fix. If you want a layout that feels open without getting sloppy, start with this style and keep the island simple, strong, and proportioned to the room.
2. Multi-Functional Island with Built-In Appliances
In Arlington and Wellesley, families often want the island to do more than hold plates and stools. We build islands with cooktops, microwave drawers, wine coolers, dishwasher drawers, and beverage centers when the home needs a second work zone. That turns the island into a real appliance station, not just a serving counter.
The layout has to work first. Put the cooktop near the prep zone, keep the beverage center closer to seating or the living area, and do not force people to cross traffic to grab a drink or rinse a knife. For island cooking, a quiet hood sized for the appliance load matters because steam and odors move fast in an open plan. Houzz's 2026 reporting says 53% of renovating homeowners also install at least one new appliance in the island, which matches what we see on jobsites every week, these islands are becoming multi-function work zones (Houzz 2026 Kitchen Trends Report).
We make a few calls early because they affect cost, safety, and how the room feels to use:
- Induction Cooktops: We recommend induction for island layouts because the surface stays cleaner and the setup is safer around seating.
- Dishwasher Drawers: Use them when the family is smaller or you want flexibility, but do not undersize the cleanup station for a busy household.
- Electrical and Gas Rough-In: Run everything before cabinets go in. Moving lines later costs more and slows the project.
- Heat-Resistant Surfaces: Quartz, butcher block, and stainless each have a place, but we choose based on how hard the island will work.
For finish selection, we also review countertop material options and cost factors before we lock the appliance layout, because the slab choice has to fit the cutouts, the heat exposure, and the way the island gets used every day. The look matters, but the fabrication plan matters more.
We also point homeowners to Kitchen remodeling tips for Massachusetts homeowners before they settle on appliance placement, because Massachusetts projects need the rough-in planned around inspection, clearances, and the way the kitchen will be wired and plumbed. In Greater Boston, when an island includes a cooktop or sink, we treat it as a permit-driven decision under the MA State Building Code and the electrical and plumbing rules that come with it. We also keep an eye on venting, service access, and the space needed for safe use around the island.
SouthRay Kitchen & Bath on coloured islands shows how a strong color choice can make an island read as a real focal point, and that same principle works when appliances are built in. A bold finish only works if the cabinet plan, countertop, and equipment placement stay disciplined.
3. Waterfall Edge Island with Statement Countertop
A waterfall island is the right call when you want the island to feel like furniture, not just millwork. In Belmont and Cambridge, homeowners often choose this look to give the kitchen a sharper architectural line and make the countertop material the star. The vertical return on one or both ends changes the whole room.
We like waterfall edges most when the slab has movement. Strong veining in marble or quartzite earns the detail. A flat, plain surface can look underwhelming once it drops down the side. That's why we talk through the slab selection before fabrication, not after.
Countertop material options and costs are worth reviewing before you lock in the island profile.
The practical side matters too. Waterfall edges work best when the base is level, square, and properly supported. Any unevenness shows immediately because the eye follows the vertical line. We also avoid pairing a waterfall edge with a busy cooktop layout, since the visual effect gets crowded once you add pots, controls, and venting.
Here's how we guide homeowners:
- Choose the right stone: Engineered quartz is more forgiving than marble for many homes.
- Keep the base clean: Minimal cabinetry below lets the slab read clearly.
- Use lighting strategically: Pendants make the edge pop at night.
- Avoid overcomplication: A waterfall island should look calm, not overloaded.
The NAR summary of Houzz data reports that 92% of homeowners who upgraded their island also installed new lighting, which is exactly how we treat waterfall edges, as a package with the lighting plan, not a separate decision (NAR kitchen island design summary). In a Newton luxury remodel, that often means the island becomes the visual anchor of the entire first floor.
4. Tiered or Two-Level Island with Bar Height Distinction
A two-level island solves a real problem in family kitchens. It separates the messier prep side from the cleaner seating side, and it gives the room more visual structure. In Lexington and Arlington, we use this approach when homeowners want a clear division between cooking and entertaining without building two separate surfaces.
The lower level usually sits at 36 inches, and the higher bar surface typically lands at 42 to 48 inches. That split helps guests sit comfortably while the cook still has a working surface that feels natural. It also keeps clutter away from the seating edge, which matters in homes where the island faces the dining room or family room.
A few things we insist on:
The level change has to be supported correctly. If the framing is weak, the island will wobble, and that shows up fast once people lean on it every day.
We also recommend mixing materials when the design calls for contrast. Quartz on the prep level, marble or another show surface on the upper bar, and careful lighting on both sides keeps the island balanced. If the room is narrow, though, we don't force this look. A tiered island needs enough depth to work without pinching traffic flow.
Houzz reporting shows the market keeps moving toward larger islands, with 52% of upgraded islands now exceeding 7 feet in length (Houzz 2026 reporting summarized by Forbes). That size trend is one reason tiered islands make more sense now than they did in older, smaller kitchen plans.
We use this style when the homeowner wants a hard-working island that still feels formal enough for entertaining. It's practical, structured, and still gives the room a finished look.
5. Island with Integrated Storage and Shelving
In older homes across Medford, Melrose, and Somerville, storage is usually the first problem we solve. A well-built island can absorb a surprising amount of clutter, and it can do it without making the kitchen feel crowded. That's why we build islands with a mix of drawers, closed cabinets, open shelving, and cubbies when the room needs organization more than showmanship.
Open shelving works best when it's intentional. We keep beautiful everyday items visible, like stacked dishes, cookbooks, or serving pieces, and we hide the less attractive stuff behind doors. If you fill open shelves with random containers and bulk goods, the island starts to look messy fast. In a smaller kitchen, that visual discipline matters.
We also think about how the room is viewed from adjacent spaces. The side facing the family room should carry the cleanest visual load, while the kitchen-facing side can hold heavier storage. That makes the island feel lighter from the outside and more useful from the inside.
A practical storage island usually includes:
- Deep Drawers: Best for pots, small appliances, and heavy tools.
- Open Shelves: Good for display items and frequently used pieces.
- Closed Cabinets: Necessary for the things you don't want on view.
- Brackets or Reinforcement: Important if the shelves will hold heavy dishware.
In a Cambridge colonial kitchen, this kind of island can free up perimeter cabinets and make the whole room feel less boxed in. In a Belmont farmhouse-style kitchen, it can also give the room a more relaxed, lived-in feel without sacrificing order. We recommend it whenever the homeowner says, “We never have enough storage,” because that's usually the problem behind the remodel.
6. Curved or Rounded Island Edge for Modern Comfort
Curved islands work when you want the kitchen to feel softer and less rigid. In Newton and Cambridge, we use this shape in homes where the island sits in a visible central position and needs to read like a sculptural piece. Rounded corners also help in homes with kids, because a softened edge is easier to live with than a hard corner.
The curve has to be subtle enough to stay practical. A gentle radius can make the island easier to move around, while an overly dramatic curve starts eating into usable workspace. We avoid curves when the island needs a cooktop or complex appliance layout, because the shape can fight the function.
Materials matter here. Engineered quartz and solid surface products handle curves better than many natural stones, and they're easier to fabricate cleanly. If the finish is too busy or the curve is too aggressive, the island can feel dated instead of refined.
A curved island also changes how the room gets lit. Pendants and accent lighting draw attention to the shape, especially in the evening. In a Belmont modern home, that can turn the island into the visual center of the kitchen without adding a lot of ornament.
We use curves when the room needs one of two things, safer edges, or a softer architectural line. We don't use them just because they look different. In a real Greater Boston kitchen, the curve has to earn its place.
7. Island with Integrated Sink and Dishwashing Station
An island sink makes sense when two people cook at the same time or when the main sink sits too far from the prep area. We build these for larger kitchens in Burlington, Wellesley, and Newton where the homeowner wants a second cleanup zone that keeps traffic moving. In a busy meal, that setup keeps the kitchen working instead of clogging up around one sink.
The plumbing work is the part homeowners underestimate. Sink placement changes venting, drain routing, and inspection timing, and we need that layout decided early so the cabinet plan does not get boxed in later. If you are still sorting out the bigger remodel sequence, the kitchen remodel planning guide is a useful place to start, because the sink location affects more than just the countertop cutout. Our plumbing vent size guidance is also worth reviewing before you commit to a sink location.
We build the island sink around the way the family cooks. If the cooktop also sits on the island, we keep the sink and prep area close enough to support a clean workflow. If the island is mainly for cleanup, we focus on landing space, dishwasher access, and clear walking paths so nobody collides with an open door or reaches across a wet work zone.
The biggest mistake is forcing a sink into an island that was too small from the start. Once plumbing enters the plan, cabinet depth, storage, and seating all shift. We measure the full assembly, not just the countertop, because the sink base controls the rest of the island.
In Massachusetts, this kind of island usually means plumbing and electrical permit work, and sometimes more detailed inspection coordination if the layout also includes gas or structural changes. We handle that directly with the building department so the homeowner does not have to guess what paperwork comes next. For homeowners weighing resale value against construction cost, we also recommend you browse bath renovation returns, because the same budget discipline applies when you choose where to spend on fixed plumbing features.
8. Regional Code, Cost, and Fabrication Notes for Kitchen Islands
Boston-area kitchen islands cost more to build correctly than a casual remodeler expects, and there's a reason for that. The labor is skilled, the inspections are real, and older homes often hide framing, wiring, and plumbing issues behind the walls. In Greater Boston, we plan for the island as a construction package, not a cabinet afterthought.
For practical planning, islands with built-in appliances need electrical and sometimes plumbing rough-in inspections, and cooktop layouts bring ventilation and clearance into the conversation right away. The NKBA guidance referenced in design reporting calls for at least 42 inches of clearance around islands, and 48 inches when more than one cook is in the room (design guidance summary). In Massachusetts, that clearance has to be consistent with the MA State Building Code, local inspectors, and the actual appliance plan.
Houzz's 2025 study also shows why fabrication details matter. 52% of upgraded islands are longer than 7 feet, and 29% of renovating homeowners are adding a new island while 28% are improving an existing one, which means a lot of these projects are remodels inside older rooms, not new construction (Houzz 2025 U.S. Kitchen Trends Study). Longer islands need better support, better lighting, and tighter coordination with the perimeter layout.
We tell homeowners this all the time. The island looks simple on paper, then the electrician, plumber, stone fabricator, and cabinet installer all need the same few inches to line up.
On the cost side, Greater Boston labor and materials usually place island-heavy kitchen remodels in a higher bracket than basic refresh work. The range depends on whether you're changing plumbing, adding appliances, moving walls, or upgrading the countertop and lighting package. We don't quote islands as standalone décor pieces. We quote them as part of the full kitchen system.
Browse bath renovation returns if you want another example of how we think about return, function, and long-term value across the whole house.
8-Point Kitchen Island Renovation Comparison
| Item | 🔄 Implementation Complexity | ⚡ Resource Requirements | 📊 Expected Outcomes | 💡 Ideal Use Cases | ⭐ Key Advantages |
|---|---|---|---|---|---|
| Open-Concept Island with Integrated Seating | Moderate, requires hood planning, clearances, larger footprint | Larger footprint, durable countertop, upgraded hood, electrical for island | Improved sightlines, social interaction, reduced upper storage | Open-plan family homes, entertaining-focused kitchens | ⭐ Enhances family interaction and airy modern aesthetic |
| Multi-Functional Island with Built-In Appliances | High, gas/electrical/plumbing rough-ins and complex integration | Built-in cooktop, dishwasher/microwave drawers, beverage fridge, dedicated circuits | Centralized workflow, chef-grade functionality, higher maintenance | Frequent entertainers, multi-cook households, gourmet kitchens | ⭐ Maximizes functionality and resale appeal |
| Waterfall Edge Island with Statement Countertop | Moderate, precision templating and seam work required | Premium stone/quartz, expert fabrication, higher material cost | Dramatic visual impact, perceived luxury, higher maintenance for natural stone | Design-driven remodels and luxury homes seeking a focal point | ⭐ Strong aesthetic statement; elevates perceived home value |
| Tiered or Two-Level Island with Bar Height Distinction | High, custom framing, structural support, dual countertop installation | Additional framing, two countertop runs, mixed materials; 20–40% cost premium | Distinct prep vs. entertaining zones; slightly reduced workflow efficiency | Homes needing visual/functional separation between cooks and guests | ⭐ Balances seating and prep space in one footprint |
| Island with Integrated Storage and Shelving | Low–Moderate, cabinetry-focused but requires reinforcement for heavy loads | Cabinetry, adjustable shelving, organizers; more affordable than plumbing/appliances | Significantly increased accessible storage; needs styling and upkeep | Small/older kitchens, storage-first renovations | ⭐ High storage density without adding wall cabinets |
| Curved or Rounded Island Edge for Modern Comfort | High, custom templating, CNC work, skilled fabricators required | Specialized fabrication, limited material choices, 30–60% fabrication premium | Sculptural, softer appearance; slightly less usable prep/storage area | Design-forward homes, households with children prioritizing safety | ⭐ Unique, safer edges and strong sculptural appeal |
| Island with Integrated Sink and Dishwashing Station | High, extensive plumbing rough-ins, drain slope and access considerations | Plumbing, drain routing, dishwasher/drawer, possible disposal; costly to retrofit | Secondary cleanup zone improves entertaining flow; reduces prep counter | Large kitchens, heavy entertainers, multi-cook households | ⭐ Efficient cleanup workflow and added prep flexibility |
| Regional Code, Cost, and Fabrication Notes for Kitchen Islands | Variable, depends on chosen features (venting, gas, plumbing, electrical) | Licensed trades, inspections, permits; premium features raise costs (waterfalls, curves) | Better compliance, fewer surprises, clearer budget & timeline | Any Greater Boston / Massachusetts renovation requiring code compliance | ⭐ Consolidates code, cost, and fabrication guidance to inform decisions |
What to Expect from a Kitchen Remodel Contractor in Newton MA
Choosing the right island is only half the job. Building it right means we plan the layout, confirm code requirements, coordinate permits, and sequence the rough-in work so the cabinets, stone, electrical, and plumbing all land where they should. That's how we handle kitchen remodels in Newton, Belmont, Cambridge, and the rest of Greater Boston at Aureli Construction.
Our process starts with the room, not the catalog. We look at traffic flow, ceiling height, existing framing, and where the island needs power, water, or ventilation. If the design includes a sink, cooktop, or appliance run, we coordinate the building permit, the electrical permit, and the plumbing permit as needed, then work through framing, rough inspections, finish work, and final inspections before closeout.
For homeowners asking about budget, a kitchen remodel with an island in Greater Boston usually rises or falls based on three things, appliance complexity, custom cabinetry, and whether the layout changes. We keep the project grounded in real-world trade-offs. If an island will choke circulation or force awkward clearances, we recommend a different layout, including a peninsula or a simpler prep zone.
Here's what local homeowners should expect from us:
- Clear permitting support: We handle filings and coordinate with local building departments.
- Licensed trades: Electricians and plumbers stay part of the plan from the start.
- Jobsite control: We protect the rest of the house while the kitchen is open.
- Direct communication: You know what's happening before the next phase starts.
If you're comparing contractors for a kitchen remodel Greater Boston project, ask how they handle inspections, fixture selection, and change orders. Older Massachusetts homes often reveal hidden conditions once the walls open, and we plan for that reality instead of pretending it won't happen.
Frequently Asked Questions about Kitchen Renovations
1. How long does a typical kitchen renovation with an island take in Massachusetts?
A full gut remodel with an island often takes 8 to 16 weeks from demolition to final inspection, depending on custom cabinetry lead times, permitting, and how much electrical or plumbing work the island needs. If the design includes a sink or cooktop, the schedule usually gets more involved.
2. Do I need a permit to add a kitchen island in my home?
Yes, in most cases you do if the island includes new electrical outlets, plumbing for a sink, or gas lines for a cooktop. We handle the permitting process and coordinate with local inspectors so the project stays on track.
3. Can we live in the house during the kitchen renovation?
Usually yes, but it's disruptive. We set up dust barriers and, when the space allows, a temporary kitchen station with a microwave and fridge in another part of the house. You should still expect noise, dust, and a temporary loss of convenience.
4. How are unexpected costs or change orders handled?
We document change orders in writing before extra work begins. In older Greater Boston homes, hidden framing, wiring, or plumbing issues can show up after demolition, so we build the budget carefully and talk through the likely risks early.
5. Should we choose a larger island if the room can fit one?
Not automatically. A larger island only works if the room still keeps safe circulation and useful landing space. If it crowds the kitchen, we recommend a smaller island, a peninsula, or no island at all.
Ready to get started? Contact Aureli Construction for a free estimate at homeadditionma.com.
Aureli Construction builds practical, code-smart kitchens across Cambridge, Newton, Belmont, Arlington, and the rest of Greater Boston. If you want a kitchen island that fits your house, your traffic flow, and your permit requirements, we can plan it, price it, and build it the right way. Visit Aureli Construction to request your free estimate and start your kitchen remodel with a local team that knows Massachusetts homes inside and out.