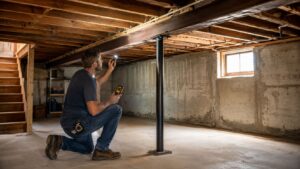
In Arlington MA, a damp basement usually shows up the same way every spring. The floor stays cool, the walls get that chalky white film, and after a hard rain or a nor'easter, a corner that looked fine on Saturday has a small puddle by Sunday.
We see the same pattern across Belmont, Cambridge, Medford, and the rest of Greater Boston because the problem isn't just one bad storm. Older foundations, tight lots, freeze-thaw cycles, and soil that holds water all push moisture toward the basement. If you want a plain-English overview from another contractor's point of view, Awesim Building Consultants' guide is a useful reference before you start talking to bidders.
Table of Contents
- Why Greater Boston Basements Stay Damp
- What Foundation Waterproofing Actually Means
- Exterior and Interior Waterproofing Systems
- Comparing the Common Waterproofing Methods
- Warning Signs of Foundation Moisture Problems
- DIY Versus Hiring a Massachusetts Licensed Contractor
- Permits, Codes, and What to Expect During the Project
- Costs, Maintenance, and Choosing the Right Contractor
Why Greater Boston Basements Stay Damp
In Arlington, Belmont, Cambridge, and Medford, a basement rarely gets wet for just one reason. We usually find a mix of roof runoff, settled grading, old concrete, and joints that were never detailed well enough for New England weather. Once water finds a path to the foundation, it keeps using it.
The local conditions matter
Greater Boston homes deal with moisture pressure that exposes weak points fast. The 2023 American Housing Survey reports 11.7 million homes with water leakage from external sources, and industry summaries note that basement flooding is the single most common foundation issue, at about 29% of homeowner-reported foundation problems (NACHI). That lines up with what we see on site, especially in basement-heavy neighborhoods in the Northeast and Midwest.
Cost also shapes the decision. Angi reports an average foundation repair cost of $5,165, with basement waterproofing averaging around $5,200 and some simple repairs starting near $600. Small moisture problems deserve attention before they turn into a larger teardown.
A damp basement is usually a drainage problem first, not a paint problem.
What homeowners usually notice first
The first signs are rarely dramatic. It is more often a musty smell, efflorescence on the wall, or peeling paint near the slab edge. By the time someone sees standing water, the foundation has usually been taking on moisture for a while.
That is why we walk homeowners through the site, not just the symptom. We check downspouts, slope, visible cracks, the footing line, and the way the old fill sits against the wall. We also look at the footing-to-wall joint, since that seam is a common failure point in older Boston-area basements, and we consider whether the drainage setup is sending water back toward the foundation. In some cases, the question is not only what is wet, but whether the work rises to a permit or inspection trigger under Massachusetts rules. For a homeowner who wants a broader field guide, Awesim Building Consultants' guide and waterproofing your home are helpful companion reads.
What Foundation Waterproofing Actually Means
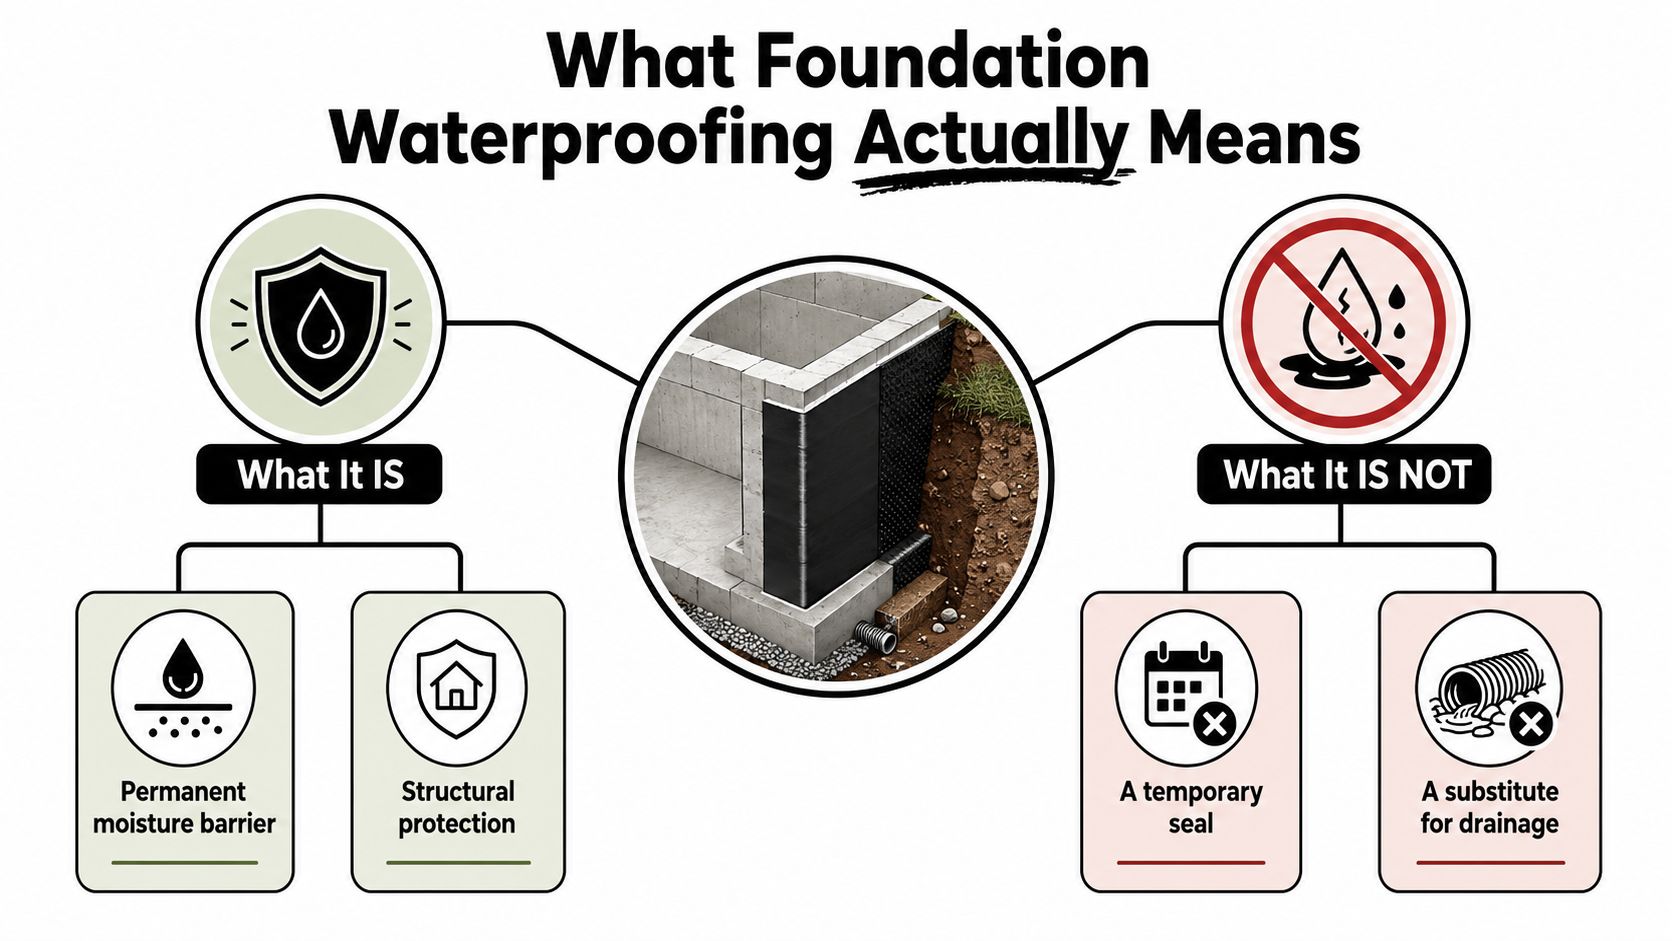
A lot of homeowners hear “waterproofing” and picture a bucket of black coating rolled onto a wall. That's not the whole story. Foundation waterproofing is a full assembly that keeps liquid water out under pressure, while dampproofing only slows down soil moisture vapor.
Waterproofing versus dampproofing
In New England, that difference matters. IRC and IBC guidance require full foundation waterproofing in high water-table or severe soil-water conditions, with the waterproofing layer running from finished grade down to the higher of the footing top or 6 inches (152 mm) below the basement floor, using systems such as 40-mil polymer-modified asphalt, 60-mil flexible polymer cement, 1/8-inch cementitious coatings, or 60-mil solvent-free liquid-applied rubber (up.codes). When hydrostatic pressure can build against the wall, a thin dampproofing coating isn't enough.
The practical takeaway is simple. If your basement is only dealing with light soil moisture, a lesser coating may be acceptable in limited cases. If water is pushing at the wall, you need a true barrier and a drainage plan that relieves the pressure.
What to ask a contractor
Don't ask, “What paint are you using?” Ask, “Is this a waterproofing assembly or dampproofing, and how is it handling pressure at the footing and joints?” That question gets you to the actual scope fast.
A useful rule of thumb is this, if the answer never mentions drainage, joint protection, or substrate prep, the scope is probably incomplete. The membrane matters, but the system matters more.
Exterior and Interior Waterproofing Systems
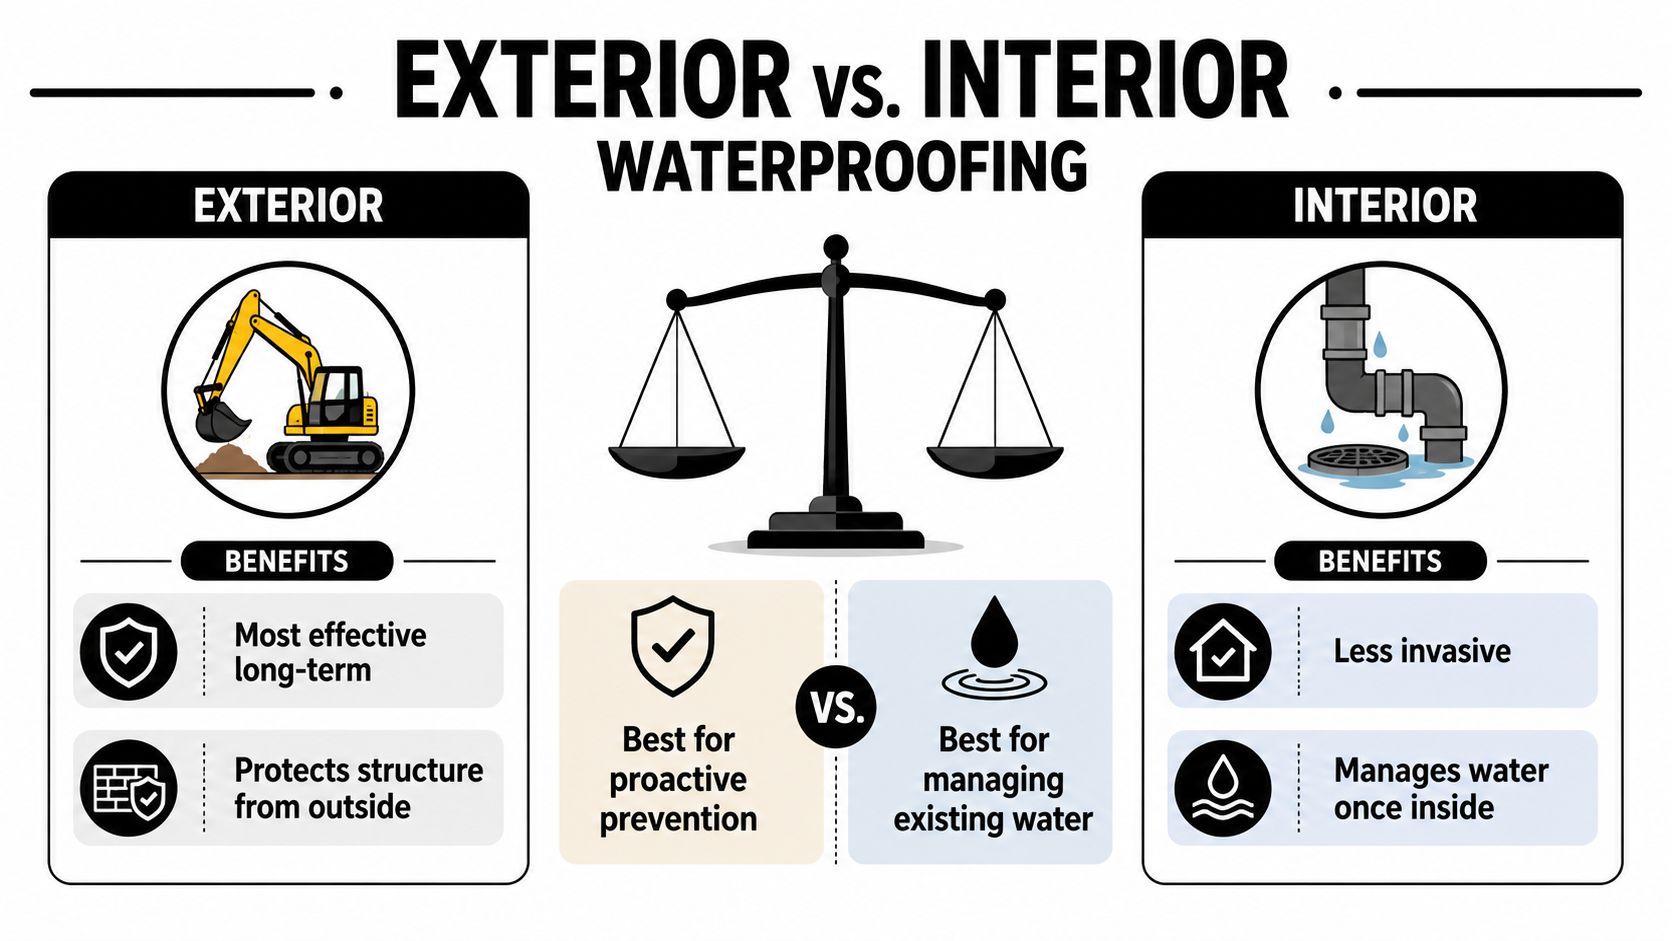
Exterior work is the cleanest way to stop water before it reaches the wall. Interior work can still solve a problem, but it usually manages water after it has already entered the structure. That's the trade-off homeowners in Newton, Somerville, and Lexington need to understand before they compare quotes.
Exterior systems do the heavy lifting
Exterior waterproofing usually means excavation, wall prep, membrane, protection board or drainage layer, and a perimeter footing drain. That approach addresses the source of the pressure instead of just catching the water inside. It's more disruptive, but it's the method we prefer when the site gives us room to do it right.
Industry guidance is clear about the details that make exterior work succeed. A smooth, clean, steel-troweled concrete surface, rounded corners, and protection over the membrane reduce puncture and adhesion failures (RENOLIT). The system is only as good as the prep.
Interior systems have a place
Interior drainage and sump systems make sense when excavation is limited by a deck, neighboring structure, or finished landscaping. They can be the right answer for a tight Cambridge lot or a side-yard in Somerville where full exterior access is unrealistic. They don't stop water at the wall, but they can relieve it before it damages the interior.
If a contractor can't excavate safely, an interior system may be the practical option, but it should still be designed as part of a larger drainage plan.
For homeowners who want to see the mechanics, the video below is a good visual reference.
The right choice depends on access, soil conditions, and how much of the foundation needs to be protected. We look at the whole basement, not just the wet corner.
Comparing the Common Waterproofing Methods
Four methods come up in almost every estimate. Sealants, membranes, drainage, and sump pumps each do a different job, and they don't all solve the same problem. In practice, the best system often uses more than one.
What each method actually does
Liquid sealants and waterproofing paints are usually the cheapest-looking answer, and they can hide minor staining for a while. They're a short-term patch, not a structural moisture fix.
Sheet or liquid membranes form the primary barrier. They're what you want when the wall itself needs protection from bulk water and pressure.
Drainage systems, including French drains and footing drains, move water away from the foundation and reduce hydrostatic pressure. Sump pumps with battery backup are the last line of defense, not the first. They matter when groundwater or storm runoff still reaches the interior system.
The installation details are where good jobs separate from bad ones. Trade guidance calls for a smooth substrate, protection layers such as at least 500 g/m² geotextile or a 1.5 to 2.0 mm PVC protection sheet over a 1.5 mm PVC geomembrane, plus primer on a dry surface, 3 in (7.6 cm) overlaps, and corner reinforcement before backfill (RENOLIT). Those aren't cosmetic details, they're failure prevention.
Typical MA cost ranges
| Foundation Waterproofing Methods Compared for Greater Boston Homes | Typical MA Cost Range | Best For | Lifespan |
|---|---|---|---|
| Liquid sealants | Lower-cost patch level | Minor cosmetic moisture control | Short-term |
| Membrane systems | Mid to high range | Real barrier protection | Long-term when installed well |
| Interior drainage with sump | Mid range | Managing water in tight-access basements | Long-term with maintenance |
| Full exterior waterproofing | Higher range | Proactive protection and pressure relief | Long-term |
How we read those numbers
For a homeowner in Burlington or Wellesley, a quote that sounds cheap usually leaves something out. It may skip joint reinforcement, drainage, or protection board. A higher number isn't automatically better, but a vague number usually means the scope is incomplete.
A good estimate should describe what gets excavated, what gets sealed, how water moves away, and how the system is protected during backfill. That's the part homeowners should compare, not just the bottom line.
Warning Signs of Foundation Moisture Problems
Homeowners often notice basement moisture issues after the problem has already been there for a while. The clues show up earlier if you know where to look. Once you start checking the right spots, the pattern gets easier to read.
What to look for first
Efflorescence on concrete or block walls means moisture has moved through the masonry and left minerals behind. Musty odors usually mean damp materials or hidden microbial growth, even if the floor looks dry.
Peeling paint, rust on HVAC equipment, and mold at baseboards point to repeated moisture, not a one-time spill. Bowed or cracked walls are more serious, because they can mean the wall is taking pressure or moving under load.
Sump pumps running constantly during dry spells is another red flag. That usually means groundwater is still feeding the system, or the interior drain setup is doing too much of the work.
Where failures often start
The weak points are often not the big open wall surfaces. They're the footing-to-wall joint, cold joints, corners, and pipe penetrations. Those spots need extra membrane reinforcement or sealing because they're where water finds a path first (ConcretE Network).
If the stain keeps returning at the same line, look below it, not just on it.
If you want a practical checklist for symptoms and moisture control, the guide at basement moisture control is a good place to start. A homeowner with a flashlight can catch a lot before it becomes a major repair.
DIY Versus Hiring a Massachusetts Licensed Contractor
A homeowner can absolutely handle some parts of moisture control. Extending downspouts, cleaning gutters, and improving grading are smart first moves. Painting a wall and hoping for the best is not the same thing as solving a foundation problem.
What's reasonable to do yourself
If the issue is surface water, start outside. Make sure roof runoff gets away from the house, correct obvious negative grade, and keep mulch or soil from trapping water against the foundation. Those are useful maintenance tasks, and they often reduce stress on the basement.
Where the line gets crossed
Once the job involves excavation, structural cracks, sump wiring, plumbing tie-ins, or a membrane that has to survive backfill, you're in regulated territory. In Massachusetts, that means compliance with the MA State Building Code and 780 CMR, and the work often triggers building, plumbing, or electrical permits. That's where a licensed general contractor is the safer call.
A poorly done DIY waterproofing job can also complicate resale and insurance questions later. A buyer, inspector, or insurer will care less about the brand of sealant and more about whether the system was installed and permitted correctly.
A proper assessment can also help you avoid paying for the wrong fix. For homeowners who are trying to decide whether the basement needs structural attention, foundation assessment is the kind of review that keeps the scope grounded in what's happening below grade.
Permits, Codes, and What to Expect During the Project
Foundation waterproofing in Cambridge, Somerville, and Belmont is usually more than a weekend project. The permit path depends on the scope, but once excavation, drainage, electrical, or plumbing work enters the plan, the building department wants to see it documented. Local zoning review can also matter if access, lot lines, or exterior changes affect the work.
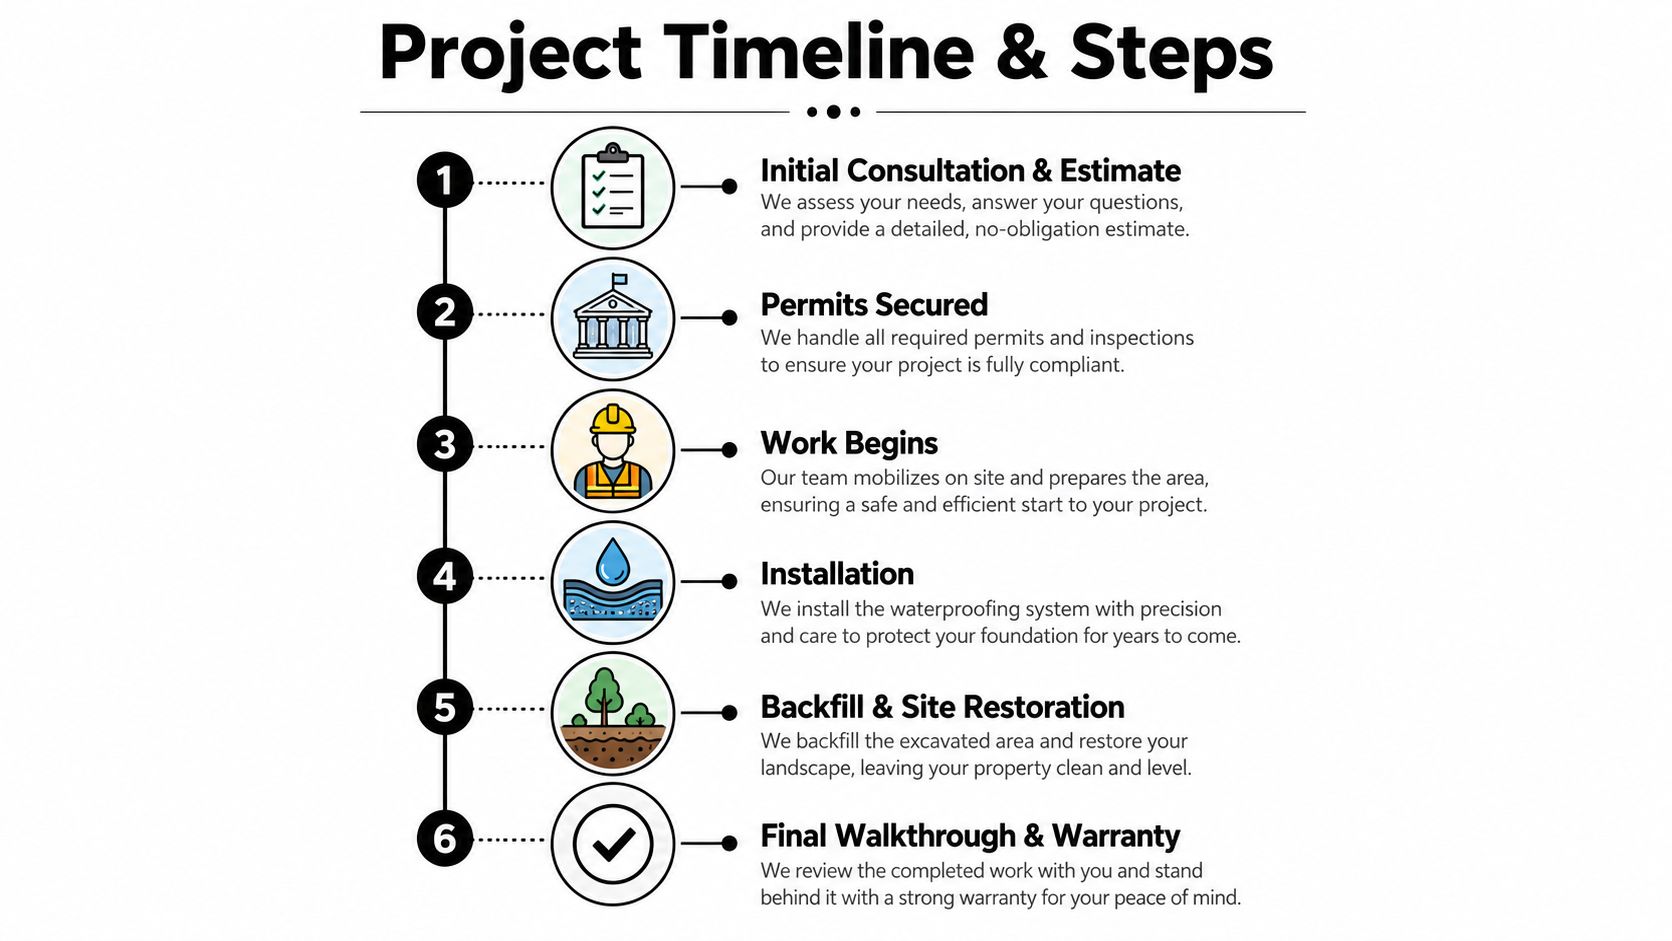
What the job flow usually looks like
A typical project starts with an estimate and site review, then moves into permits, excavation or interior prep, installation, backfill or restoration, and a final inspection. If a sump pump or dehumidifier needs dedicated electrical work, that gets handled under the right permit with the right inspection. Plumbing tie-ins, if used, are treated the same way.
The important part is sequencing. Rough inspections happen before the work gets buried, and final sign-off happens before the project closes out. That's how you avoid surprises later.
Aureli Construction handles permitting and coordinates with local building departments across Greater Boston, so the homeowner isn't left guessing which office needs what. That matters just as much as the membrane choice when the basement work is part of a larger remodel or addition.
Costs, Maintenance, and Choosing the Right Contractor
In Greater Boston, waterproofing quotes usually hinge on access, excavation depth, and how much of the system has to be rebuilt. Interior drainage and sump pump work often cost less because the crew stays inside the foundation, while full exterior waterproofing runs higher because the labor, digging, and restoration add up fast. If you are trying to compare a waterproofing scope with broader basement work, how much to remodel a basement gives a practical way to frame the budget before you sign anything.
A cheap quote can hide the wrong fix. If the contractor never asks about footing-to-wall joints, perimeter drains, or where groundwater is entering, the bid may cover symptoms instead of the actual failure point.
Keep the system working
Once the work is finished, maintenance stays simple, but it cannot be ignored. Clean gutters, extend downspouts well away from the house, test the sump pump before storm season, and inspect new cracks after freeze-thaw cycles. If the yard settles or the grading changes, water will head back to the low spot.
Homeowners should also keep an eye on the drain path itself. Perimeter drainage can clog with silt over time, and a sump pit that looks fine in dry weather may show problems only when the next heavy rain hits. A damp spot near the wall after a storm is often a sign that the system needs attention, not a reason to wait for the next season.
When you compare contractors, ask for license, insurance, local references, a written scope, and warranty coverage. If a bidder cannot explain how joints, penetrations, and drainage are protected, keep looking. A good basement contractor should also be able to tell you whether the work is likely to trigger permit review or inspection in your town, especially if the project includes excavation, plumbing, or electrical tie-ins. For homeowners who want to understand broader basement budgets, how much to remodel a basement is a useful benchmark before you finalize the numbers.
For a broader home improvement lens, you can also look at Aureli Construction as one option among Massachusetts licensed contractors who handle basement work, permitting, and related remodeling under one roof. If you want more exterior project context, browse Columbus home improvement projects can help you compare how different kinds of house upgrades are scoped and presented.
Ready to stop guessing about the water in your basement? Aureli Construction helps Greater Boston homeowners find the source of moisture, plan the right waterproofing scope, and handle permits the right way. Visit Aureli Construction to request a free estimate and get a clear, local recommendation for your home.